
User Guide
Everything you need to know to get started with CharityX.
Contents
For Nonprofit Organizations
For Donors
User Guide
For Nonprofit Organizations
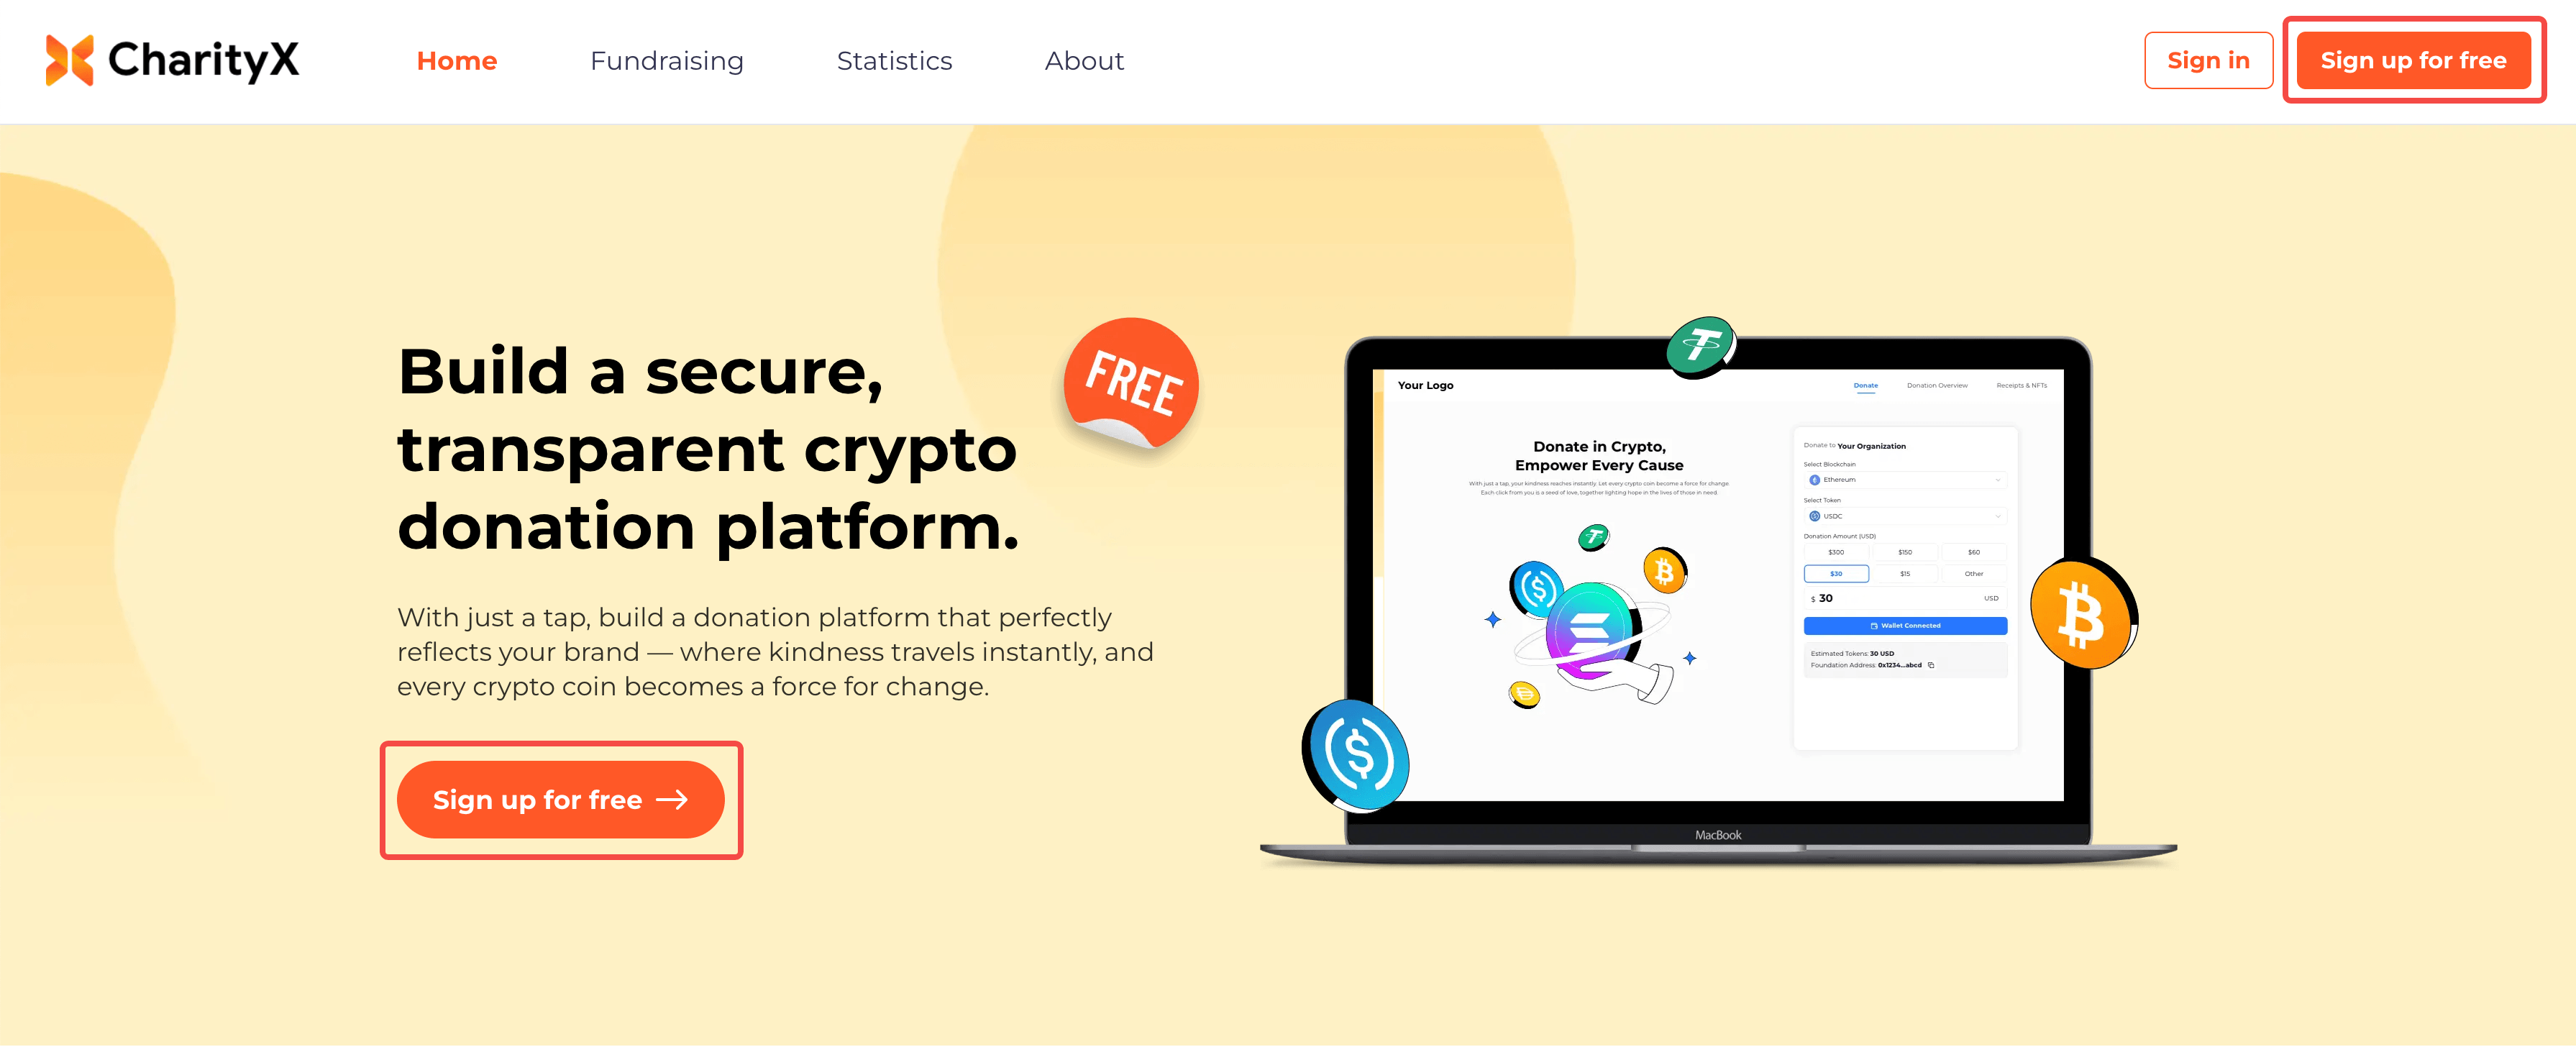
Nonprofit organizations can use CharityX to create crypto fundraising pages and receive donations globally.
Visit the website: https://www.charityx.pro
1. Free Registration
Click any Sign up for free button on the page.
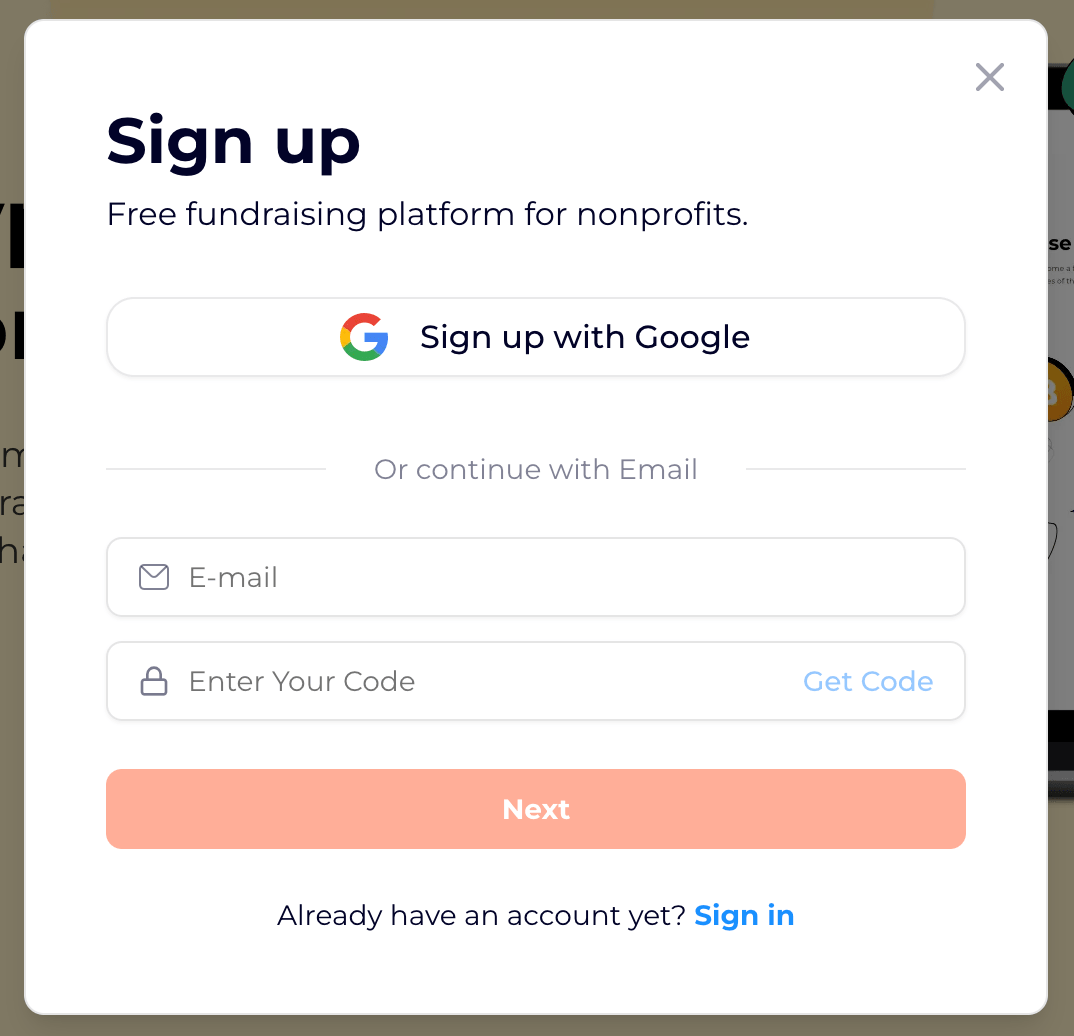
1.1 Registration Methods
1.1.1 Option 1: Sign up with Google
Register quickly using your Google account.
1.1.2 Option 2: Sign up with Email + Code
- Enter a valid email address.
- Click Get Code.
- Check your email and enter the 6-digit verification code.
- Click Next to complete registration.
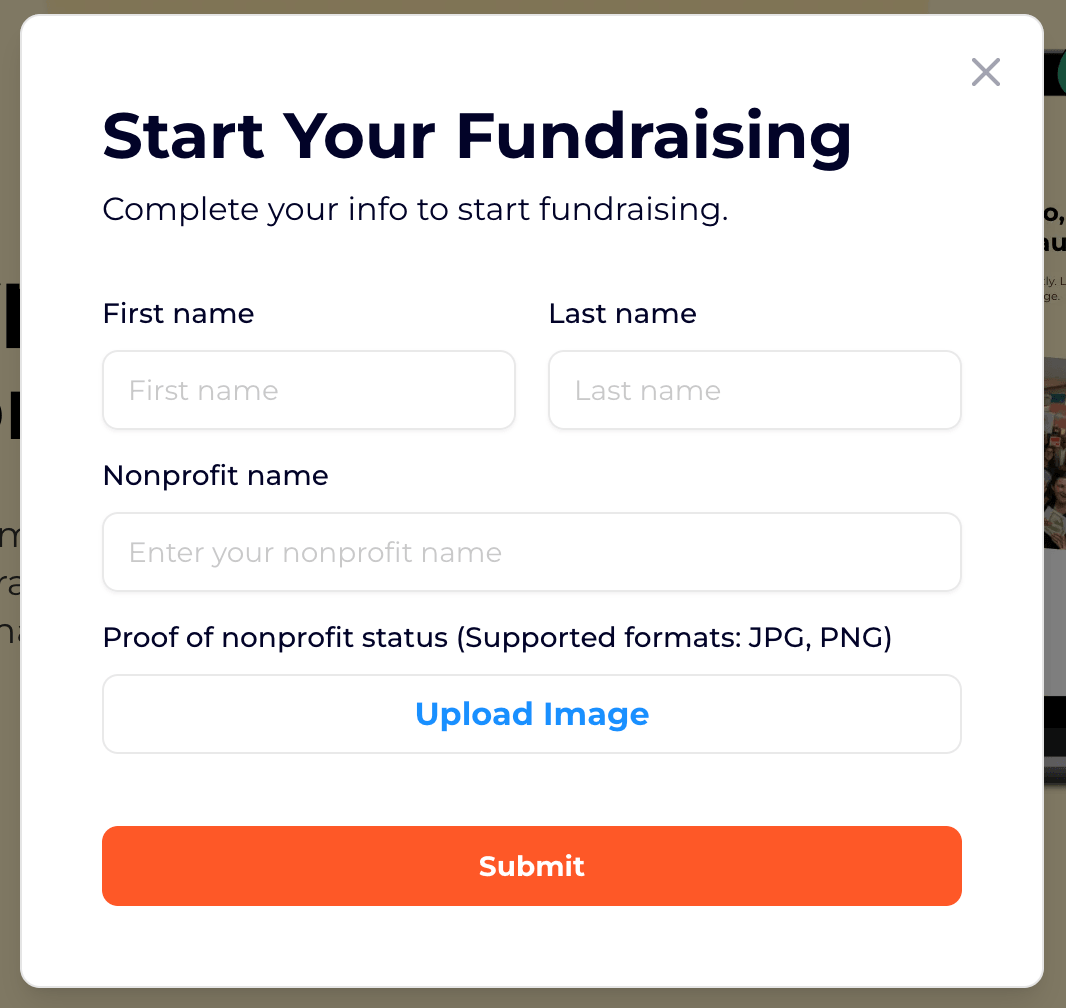
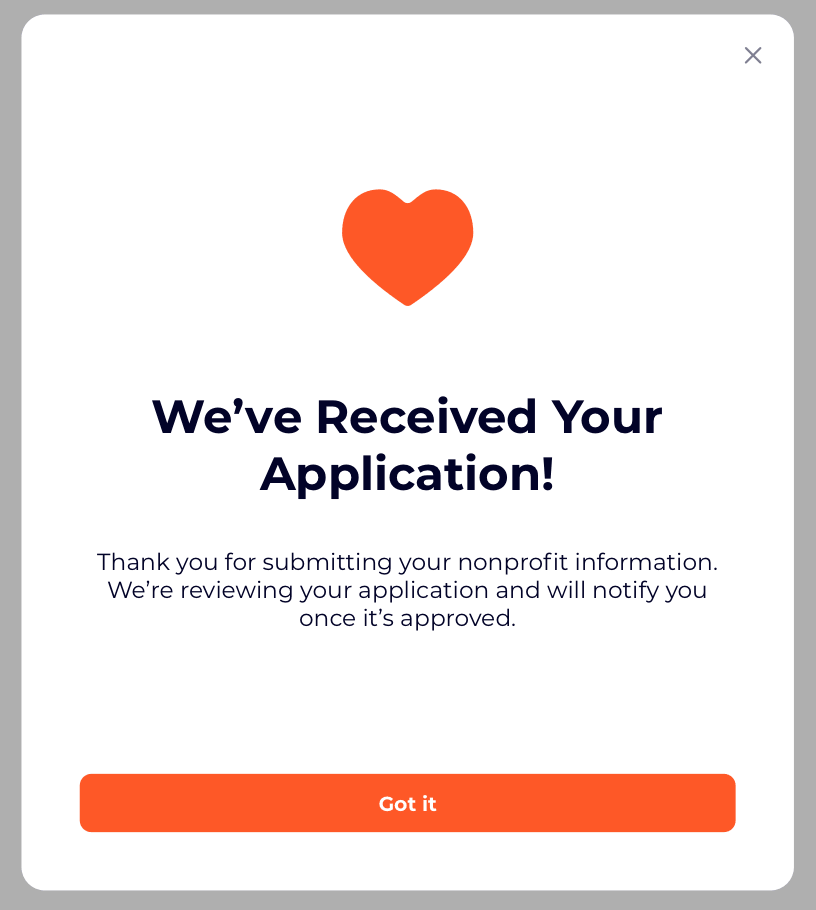
2. Nonprofit Verification
After registration, submit your organization information for verification.
Once approved, you can create fundraising pages.
2.1 Review Time
Verification usually takes 1–2 business days.
You will receive an email notification once your verification is approved.
You will receive an email notification once your verification is approved.
3. Create a Fundraising Page
After verification, click Fundraising to create your fundraising page.
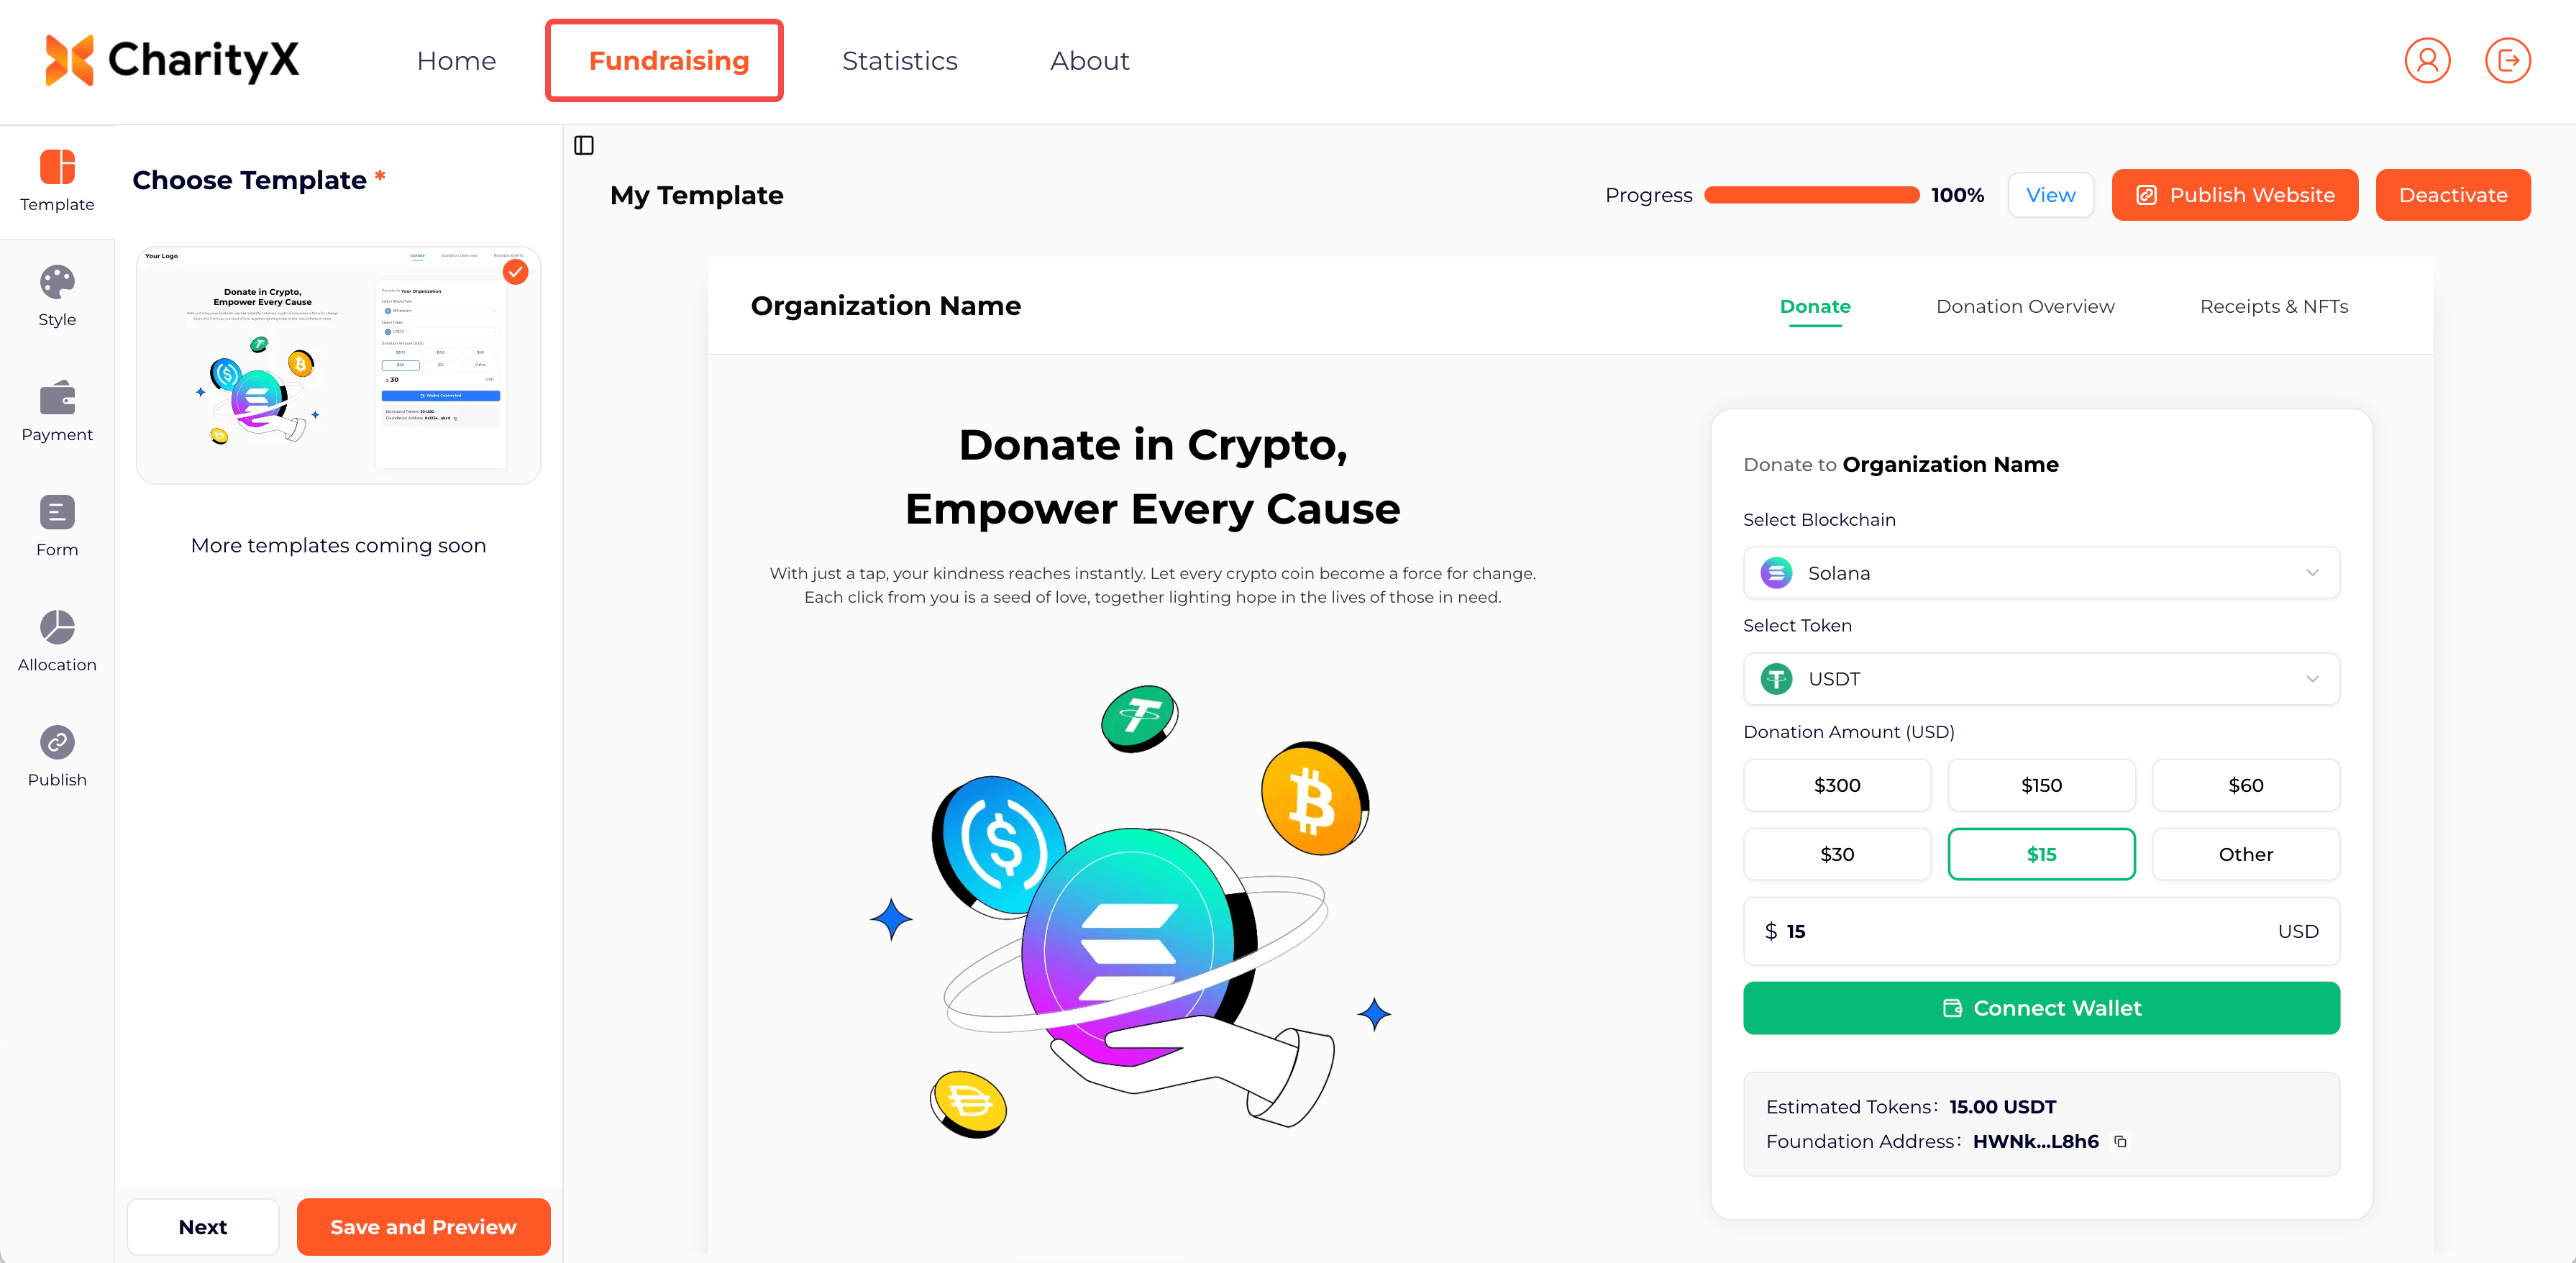
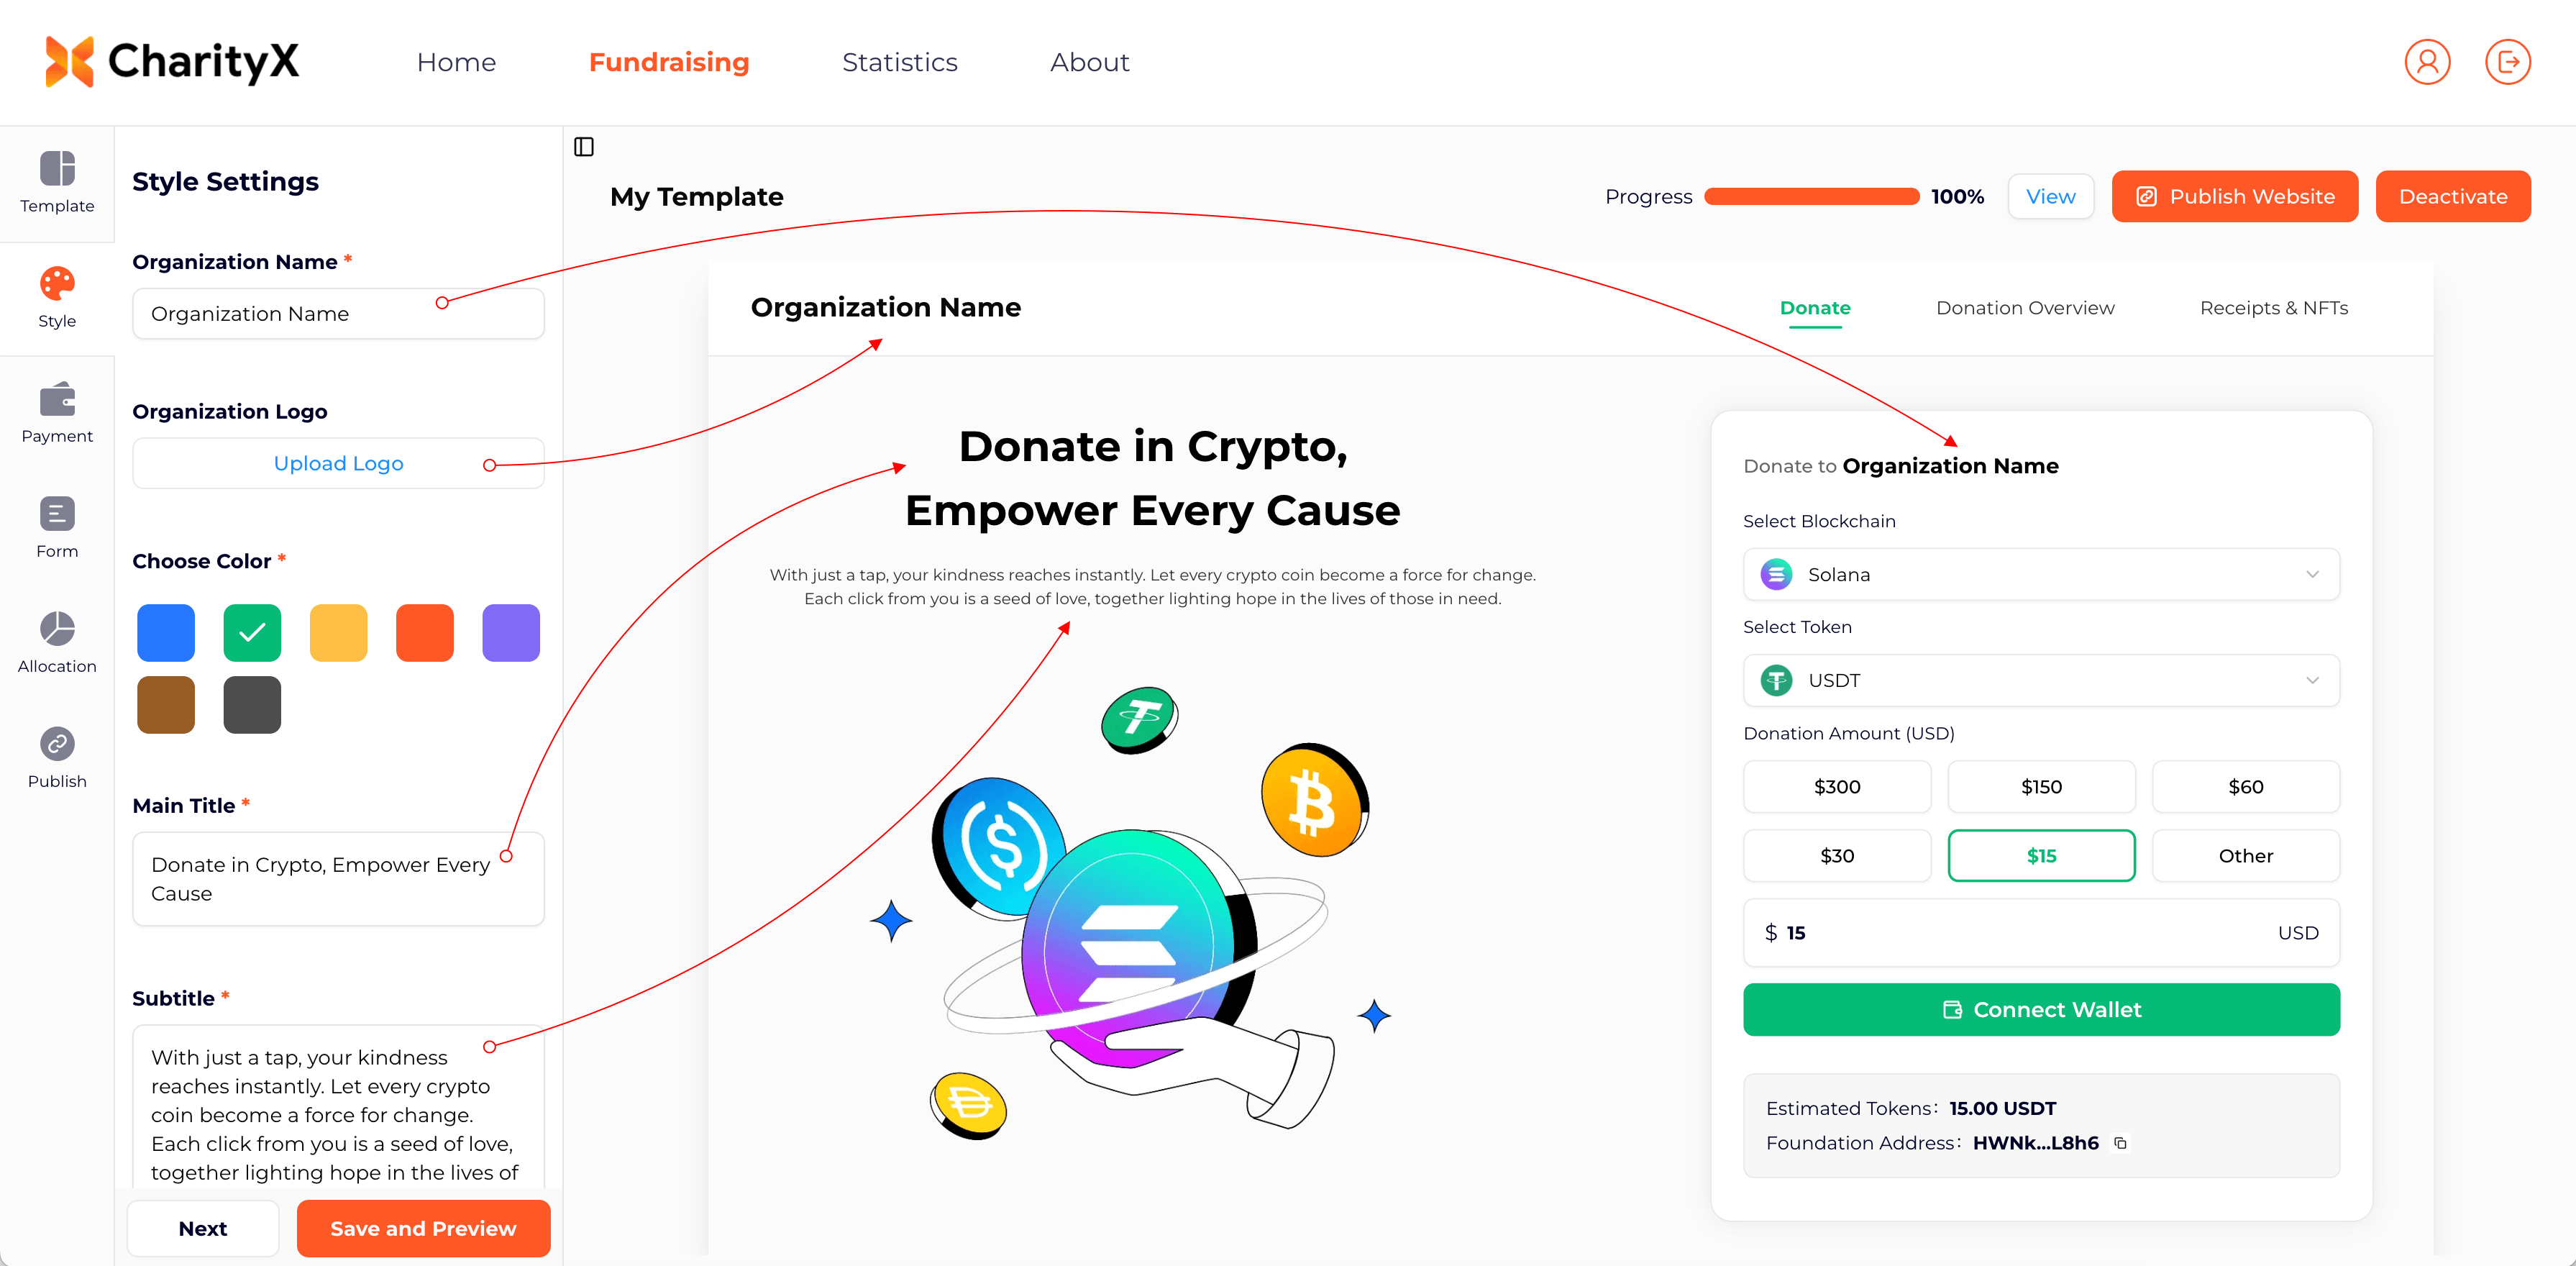
3.1 Style Settings
- Organization Name: Enter your organization's name.
- Organization Logo: Upload your organization logo. If no logo is uploaded, the organization name will be displayed instead.
- Choose Color: Choose a brand color for your organization.
- Main Title: Enter the main title of your fundraising page.
- Subtitle: Enter a subtitle for your fundraising page.
3.2 Payment Settings
- Select the chain for payment: Select the blockchain for payments. Choose the blockchain used for donations. (Currently supports Solana, with more chains coming soon.)
- Select the token for payment: Choose the tokens you want to accept (currently USDT, USDC, and Solana).
- SOLANA wallet address: Enter the Solana wallet address that will receive donations. If you do not have a wallet yet, please create one using the guide below.
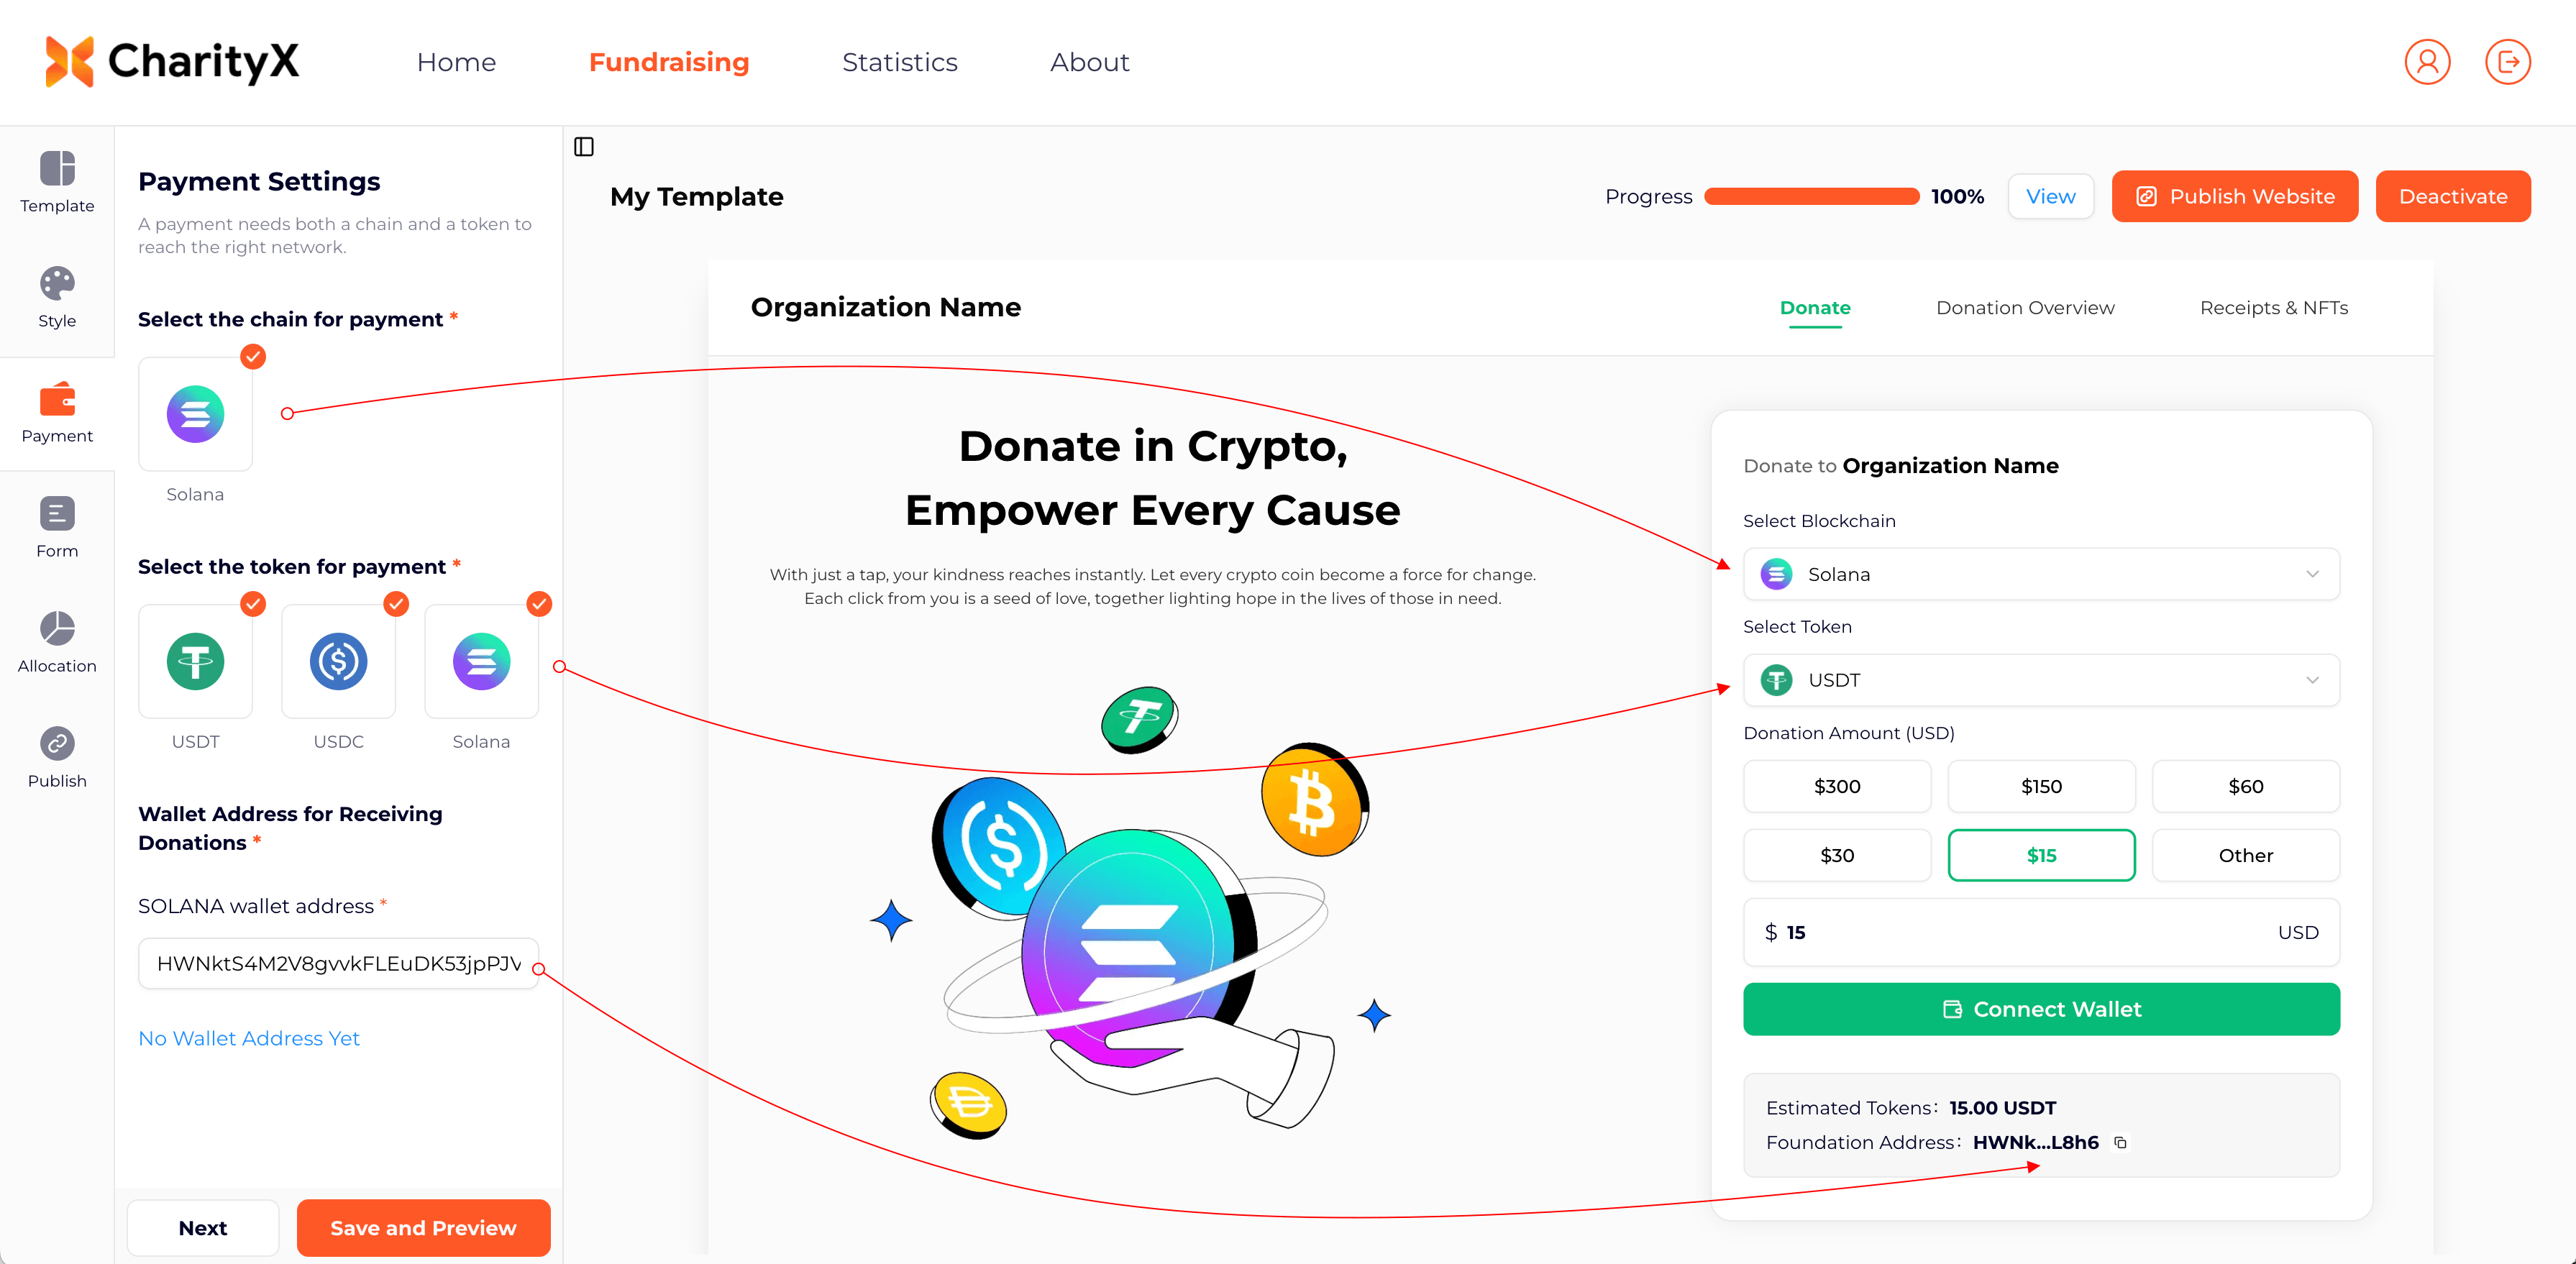
3.2.1 How to Get a Wallet
Please create a Solana wallet through a trusted wallet provider such as Phantom, Solflare, or other reputable Solana wallet applications.
Recommended Wallets
You can register a wallet via the link below to obtain your receiving address.
| Wallet | Best For | Description | Supported Chains | Register |
|---|---|---|---|---|
| SOL / ETH / BTC | Native multi-chain wallet with a smooth UX | SOL, ETH, BTC | Register | |
| All-in-one portfolio | Broad chain support, powerful all-round choice | BTC, ETH, SOL | Register | |
| Ethereum ecosystem + Solana | A widely used Web3 wallet | ETH, SOL | Register |
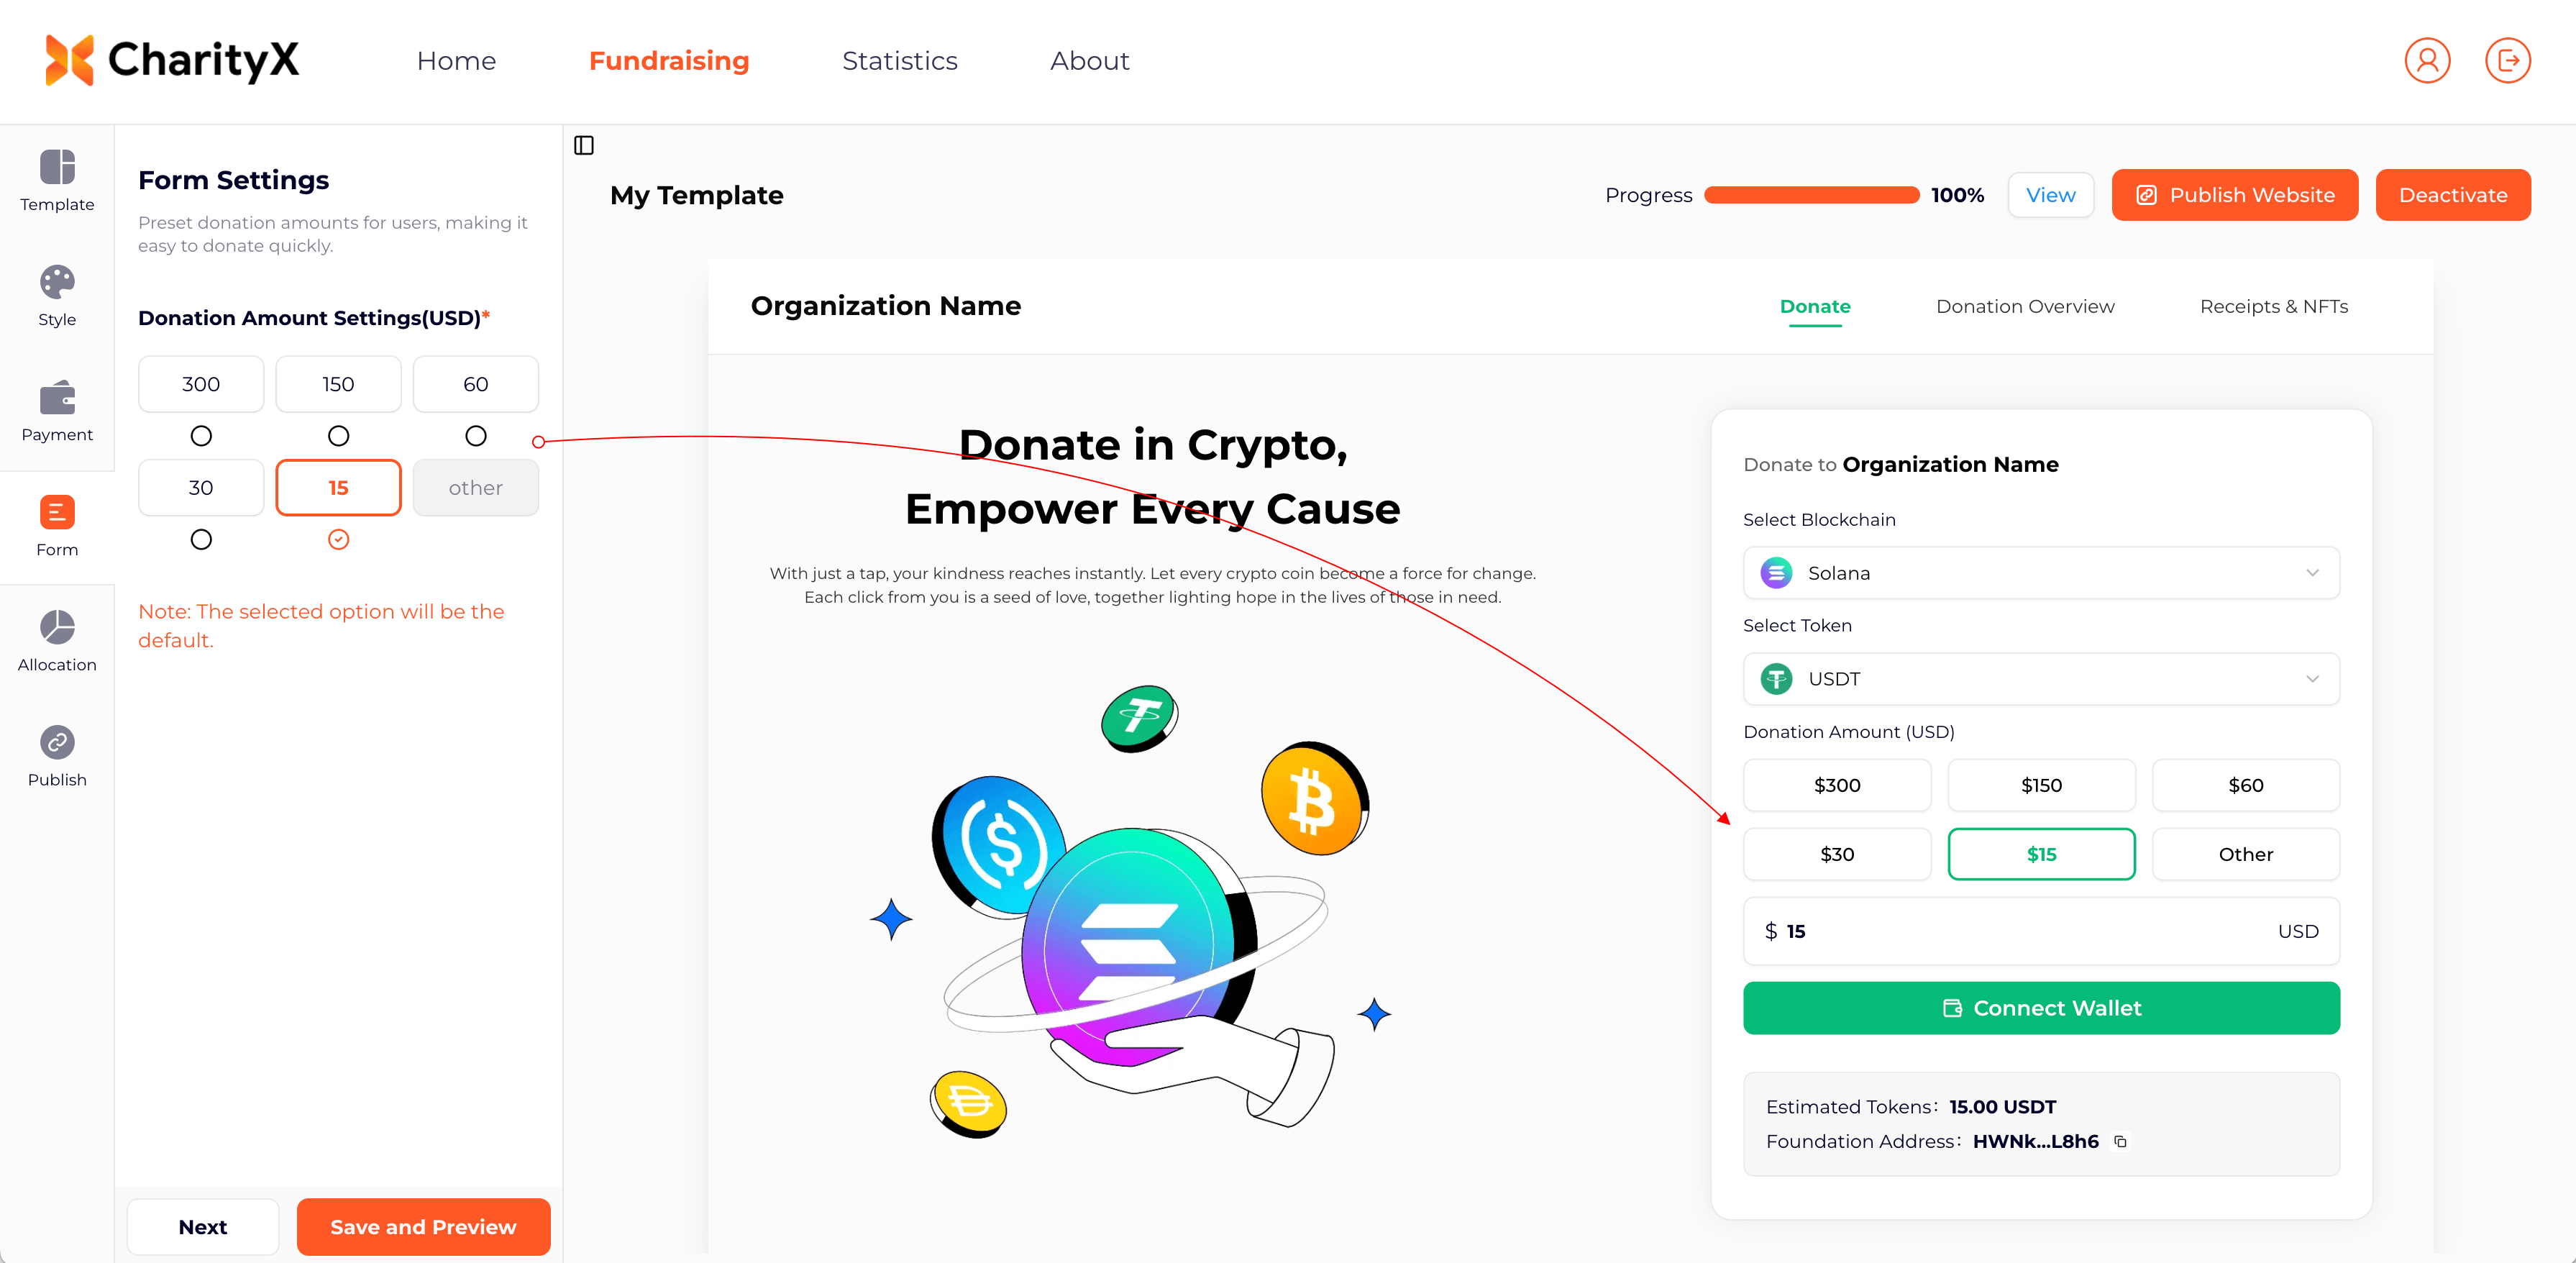
3.3 Form Settings
Donation Amount Settings (USD): Set default amounts for your donors. When an amount is selected, the system automatically converts it into the equivalent token amount.
☑️ indicates the default selected donation amount.
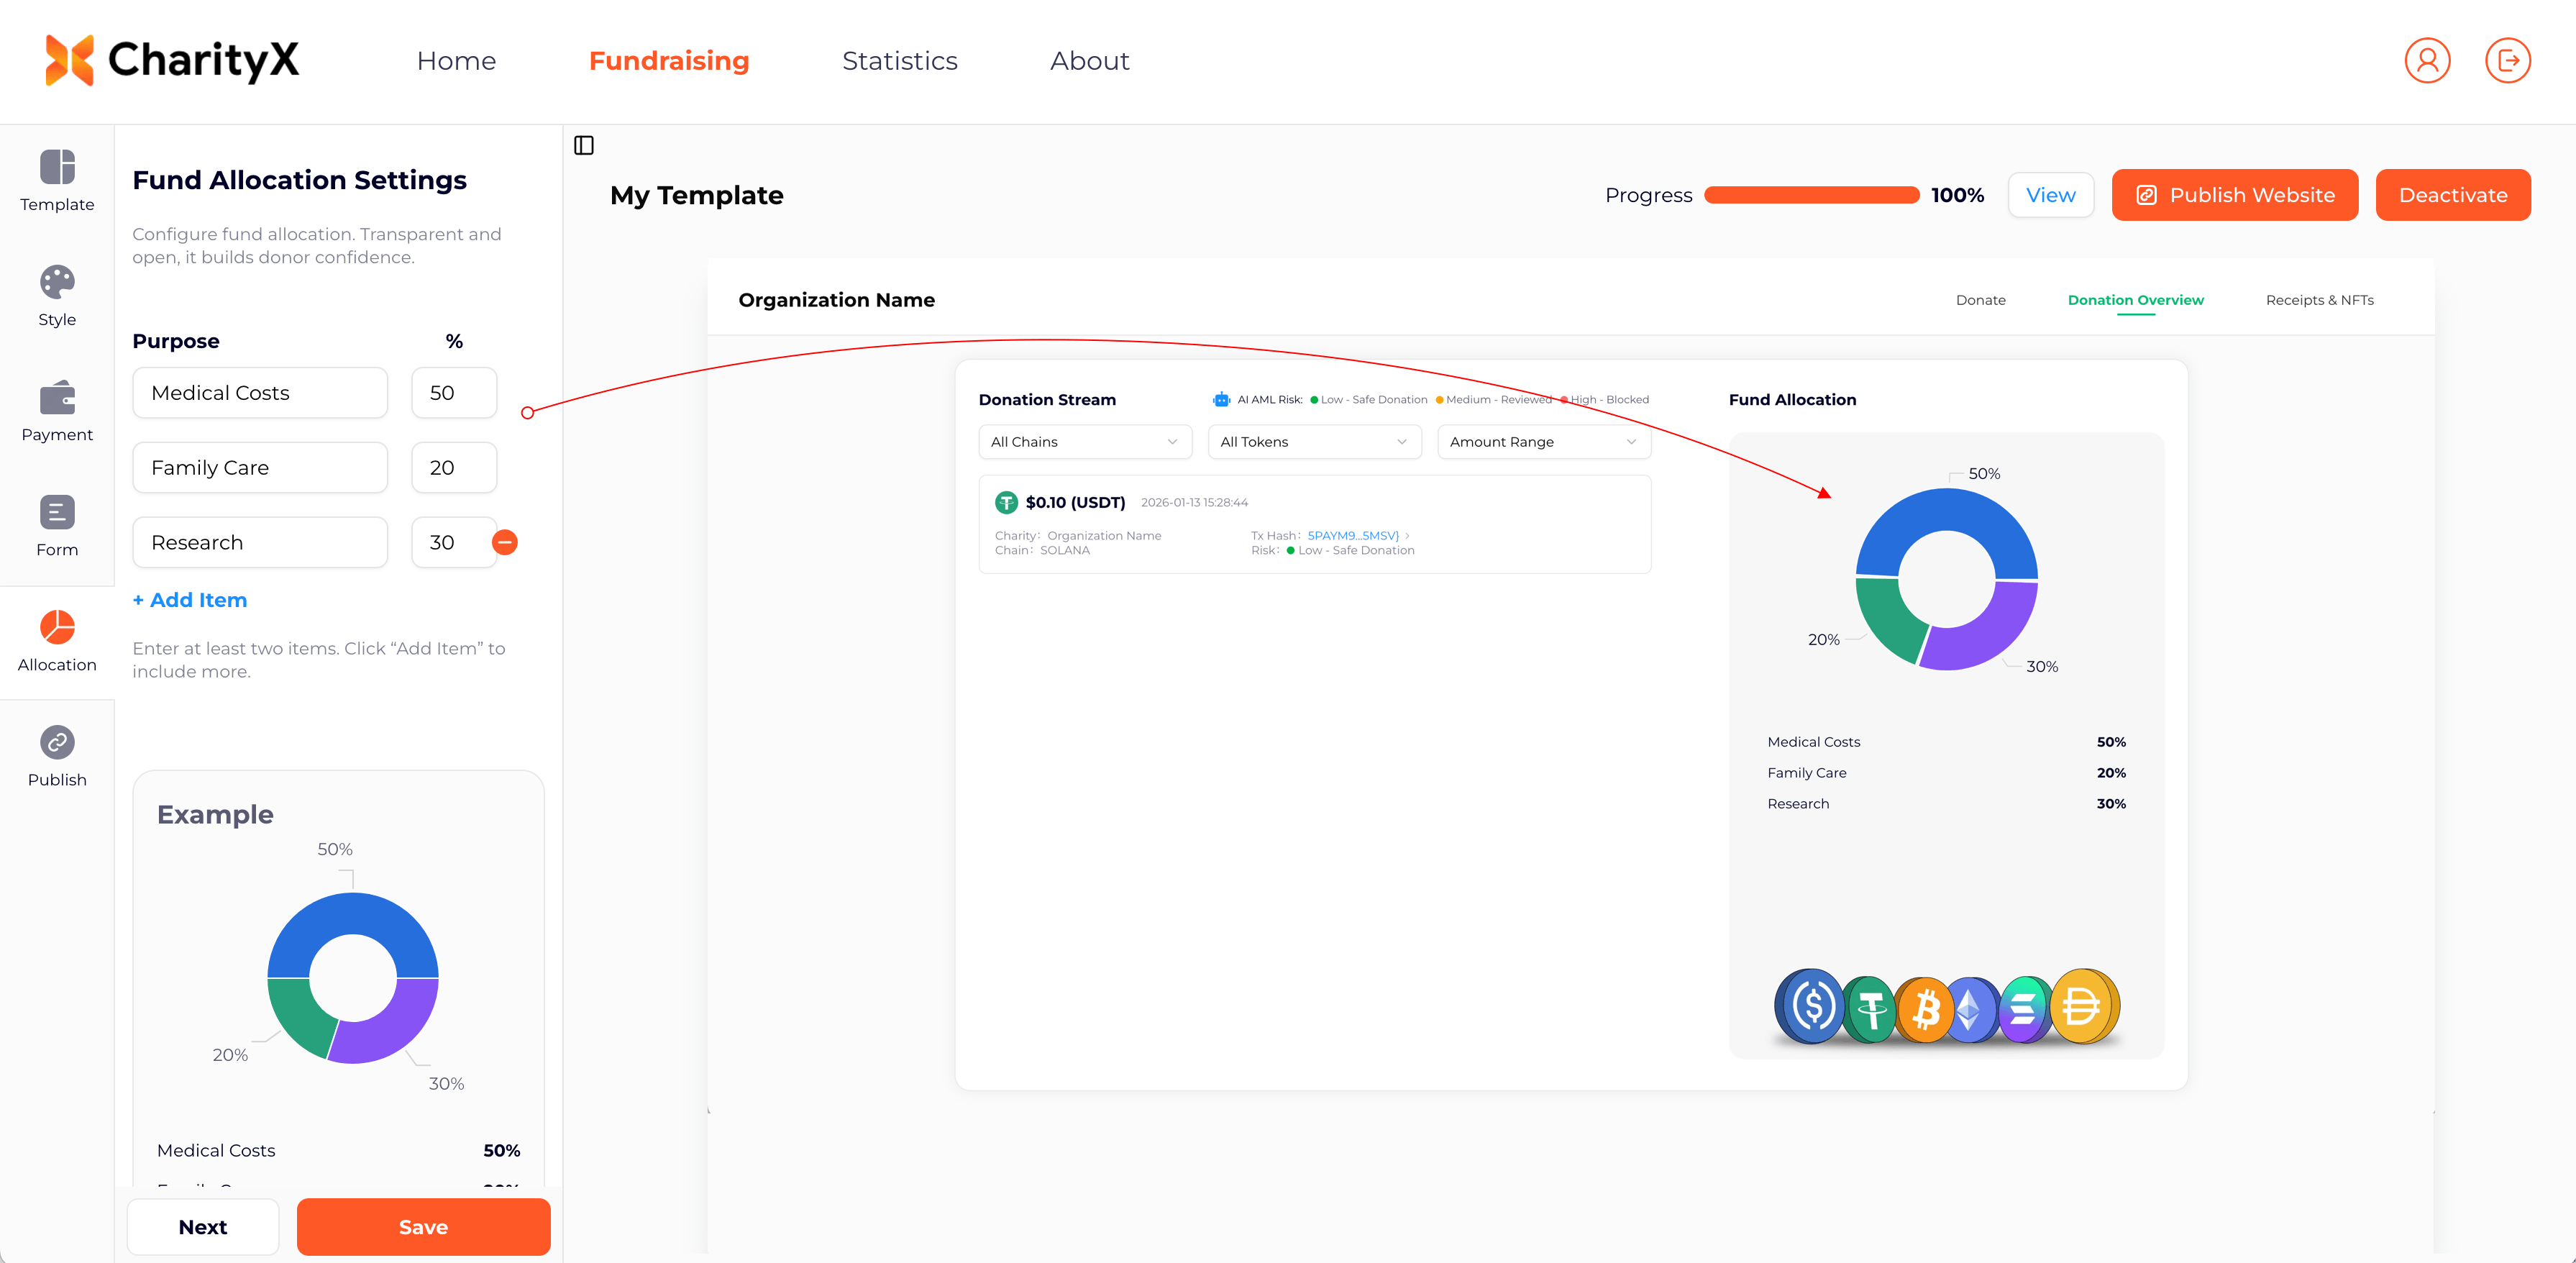
3.4 Fund Allocation Settings
Purpose: Describe how the funds will be used and the allocation percentage. This information will be displayed to donors on your fundraising page.
Add Item: Two items are provided by default. Click "Add Item" to add additional allocation categories.
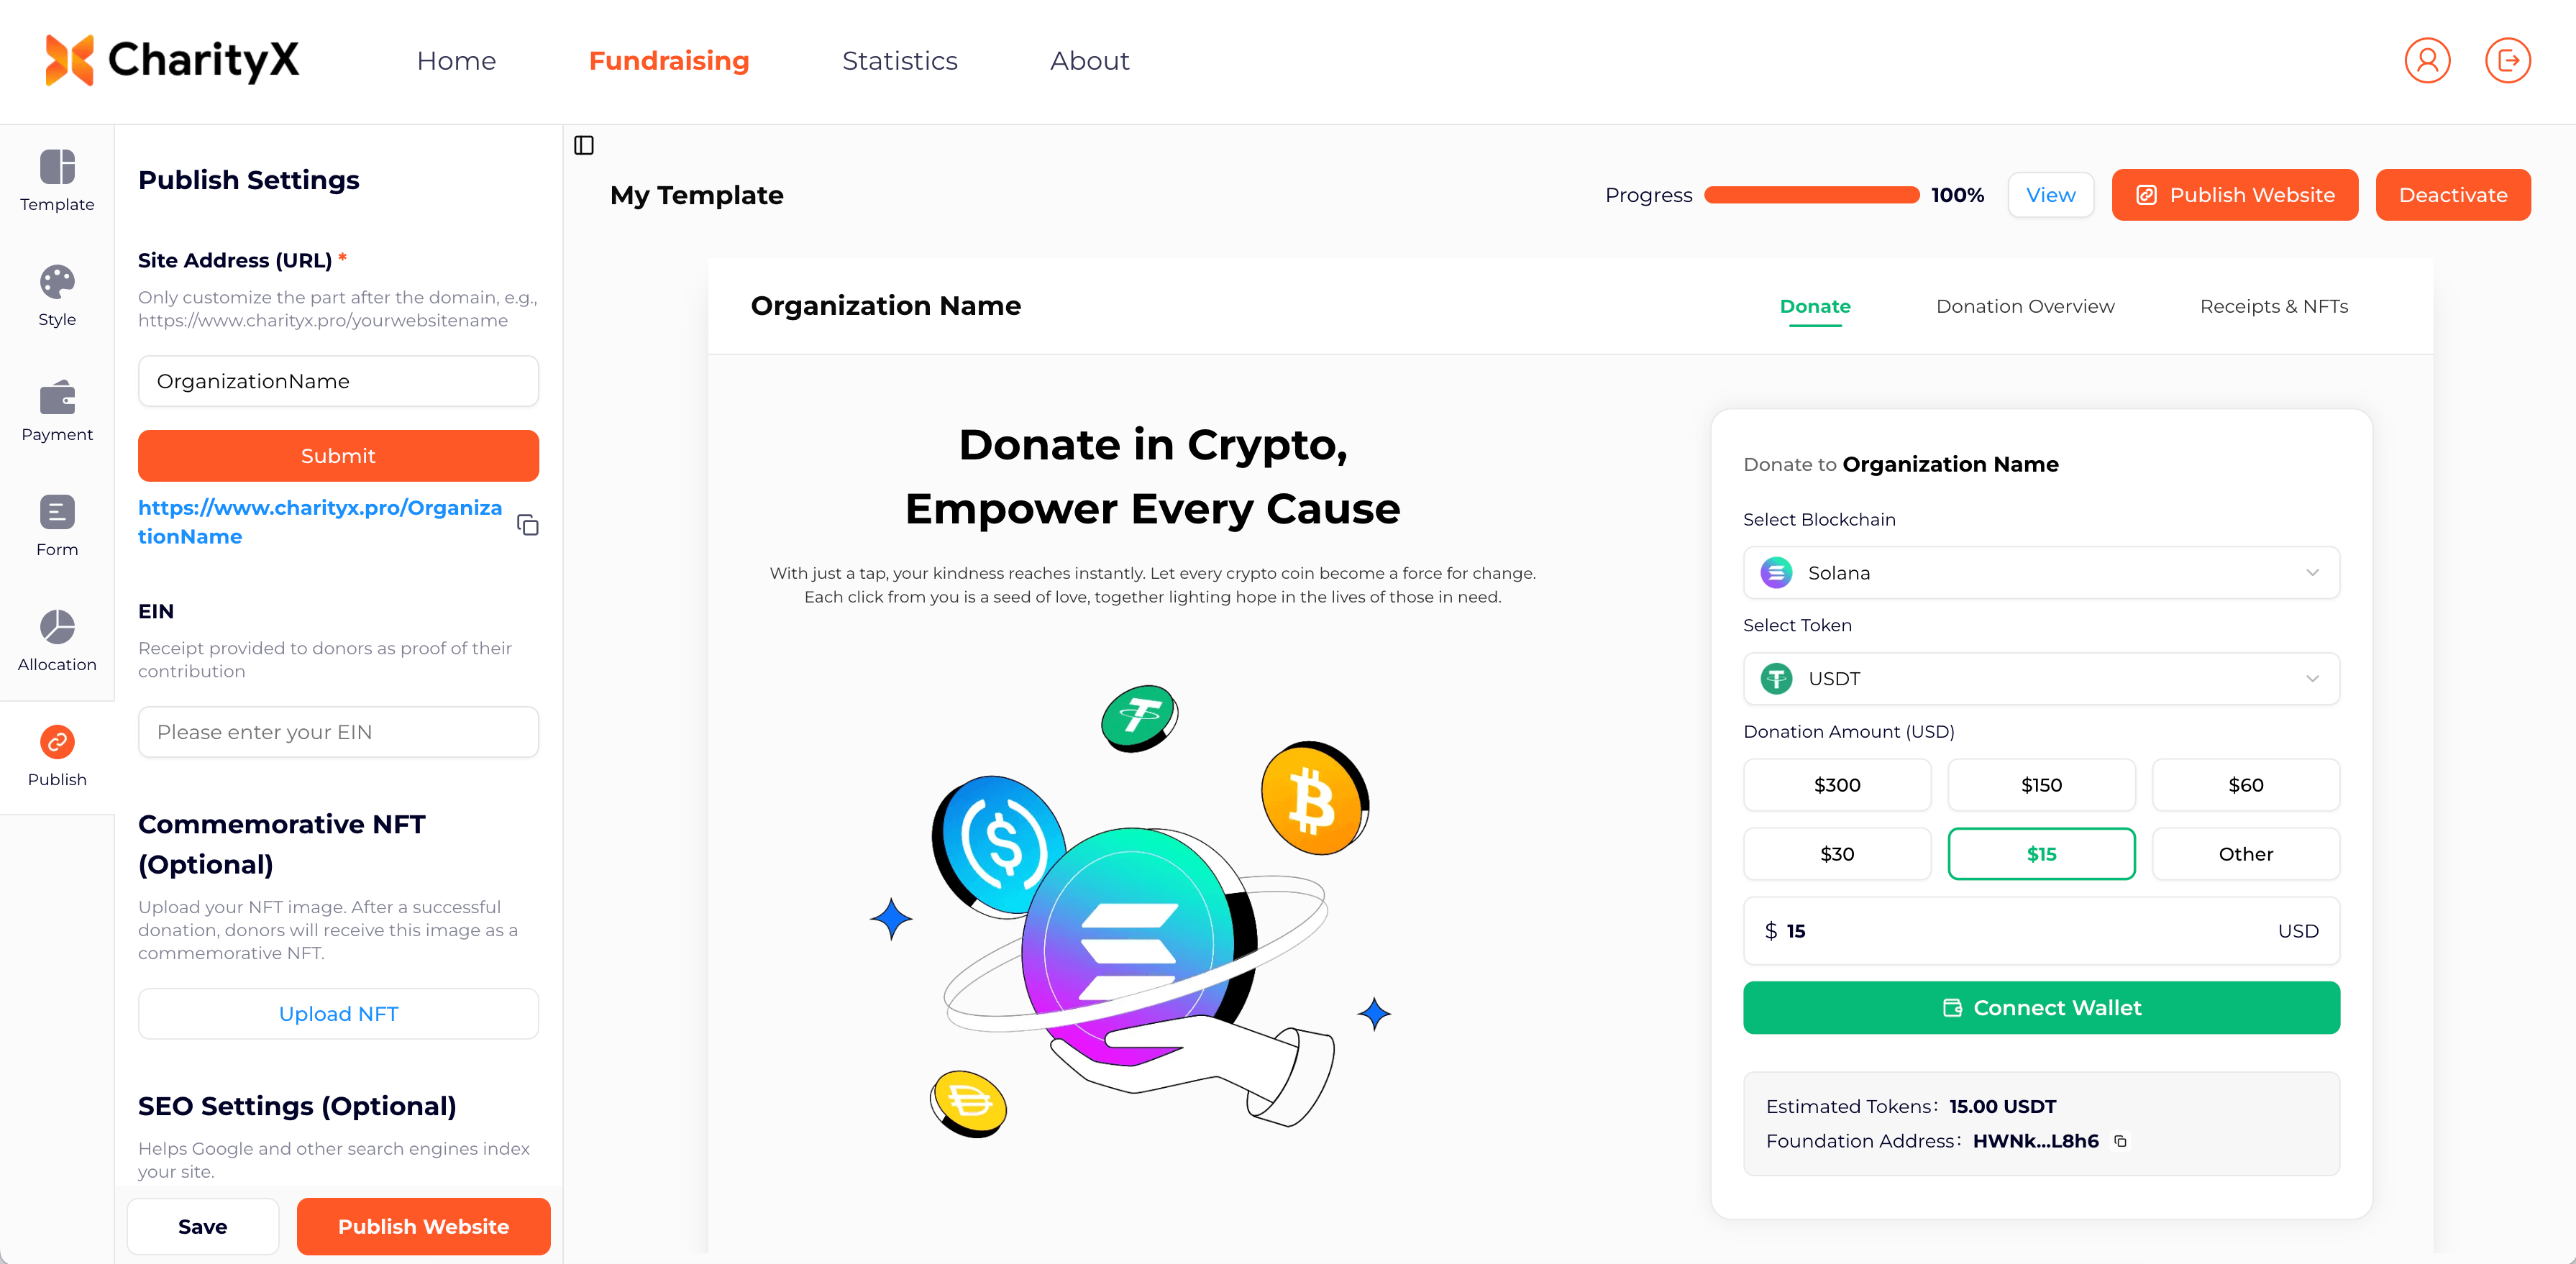
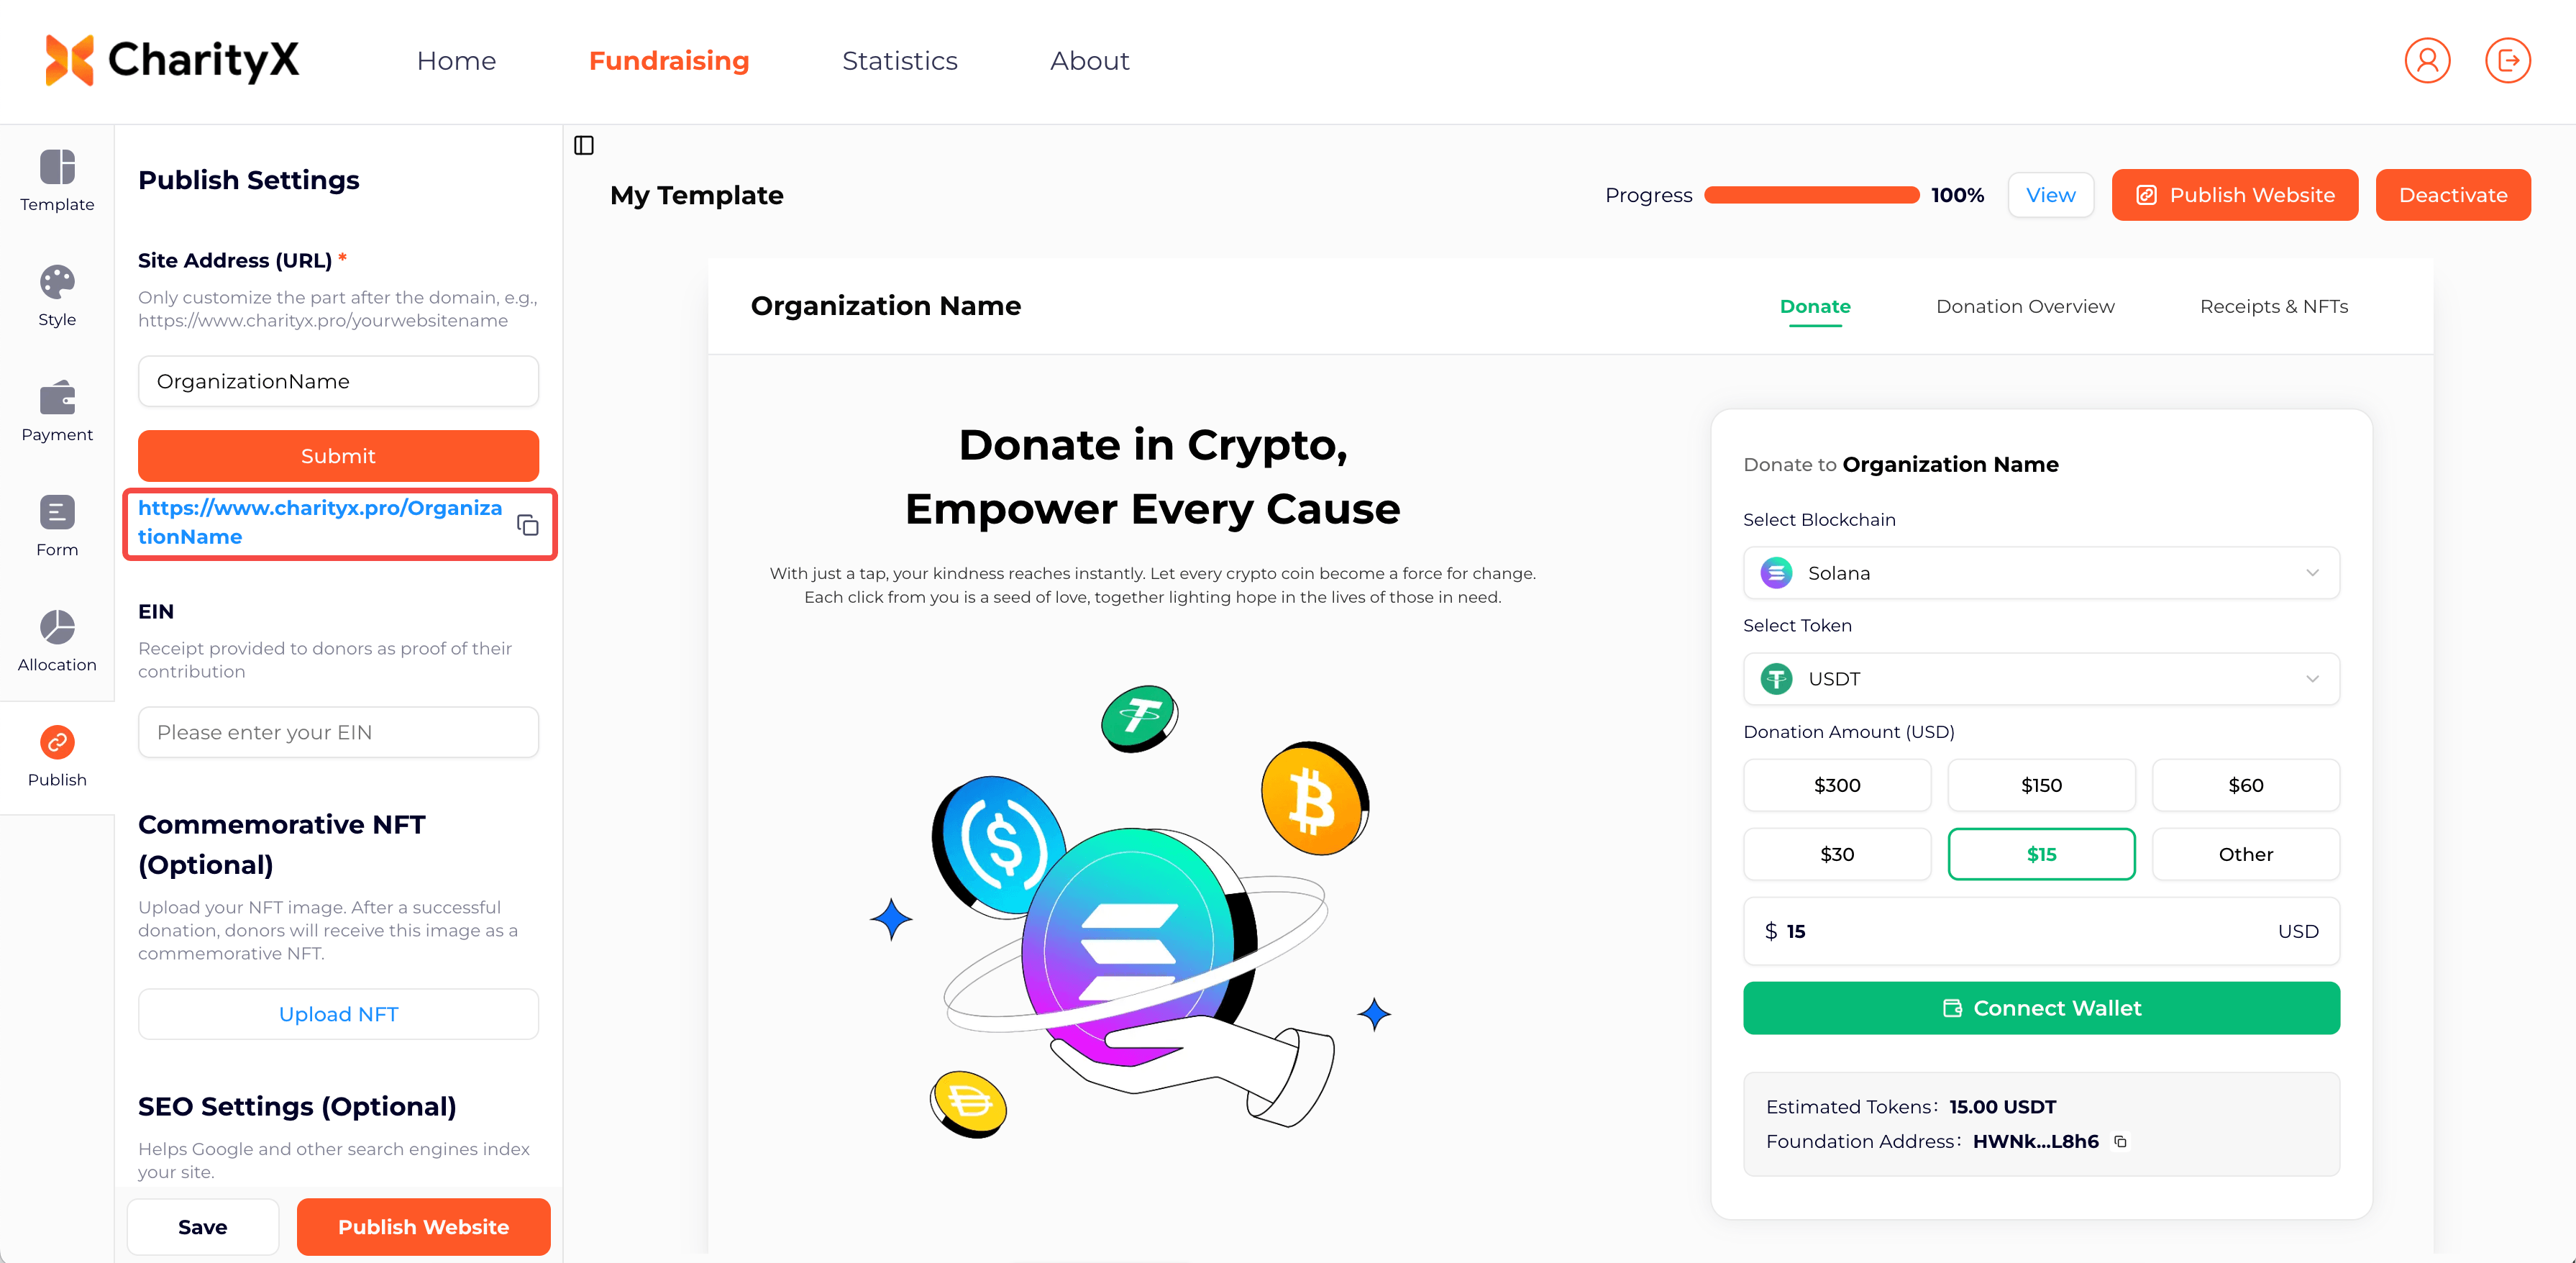
3.5 Publish Settings
- Site Address (URL): Customize the URL suffix for your fundraising page.
- Example: https://www.charityx.pro/yourwebsitename
- EIN: Used to provide donors with proof of their contribution.
- Commemorative NFT (Optional): Upload your NFT image. After a successful donation, donors will receive it as a commemorative NFT.
- SEO Settings (Optional): Helps search engines such as Google index your page.
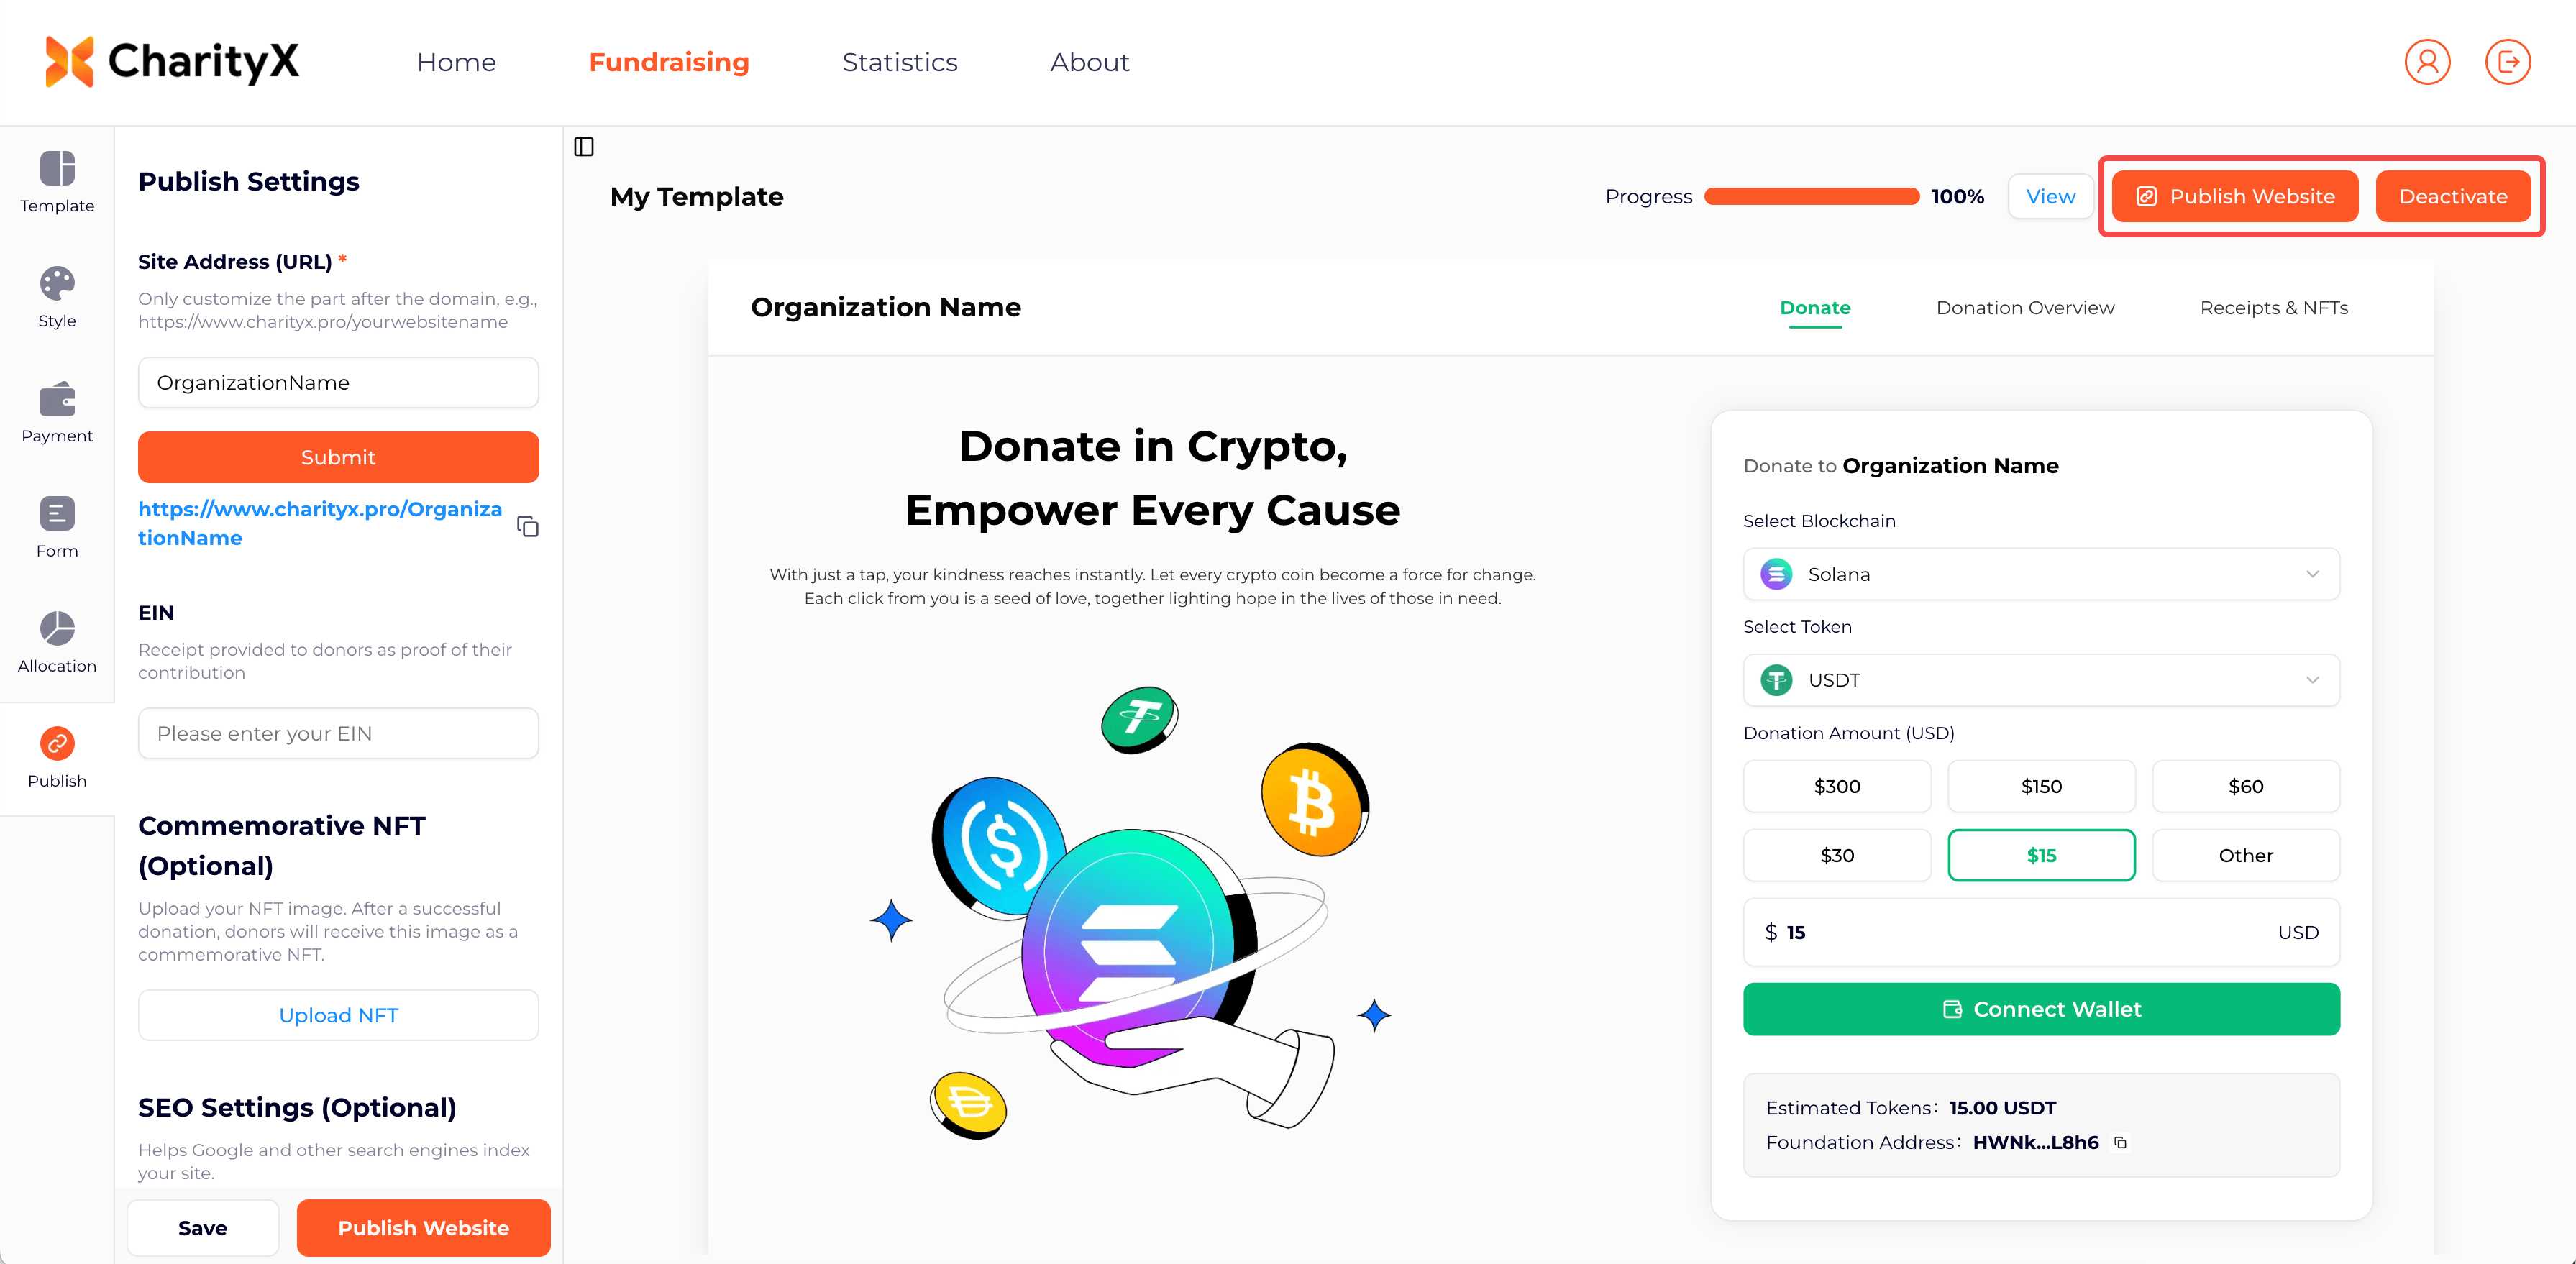
3.6 Publish
- Publish Website: Click this button to publish your fundraising page. If you make changes later, you must republish the page for updates to take effect.
- Deactivate: Disable the page so donors can no longer access it.
3.7 How to Receive Donations
After publishing, copy your fundraising page link and share it via:
- Your official website
- Social media
- Flyers or posters
- Email campaigns
Donors can access the page and donate using cryptocurrency.
3.8 How to Convert Cryptocurrency into USD
After receiving cryptocurrency donations, nonprofits can convert them into USD through a cryptocurrency exchange and withdraw the funds to a bank account. The general steps are as follows:
- Create an account on a regulated cryptocurrency exchange, such as Coinbase or Kraken, and complete identity verification process.
- Transfer the cryptocurrency received through CharityX from your wallet to your exchange wallet address.
- Convert the cryptocurrency, such as USDT, USDC, or SOL, into USD on the exchange.
- Withdraw the USD to your linked bank account.
Available withdrawal methods may vary depending on your country or region, so it is recommended to use a reputable and regulated exchange.
For Donors
Donors can access the fundraising page through the link shared by the nonprofit organization.
Example: https://www.charityx.pro/yourwebsitename
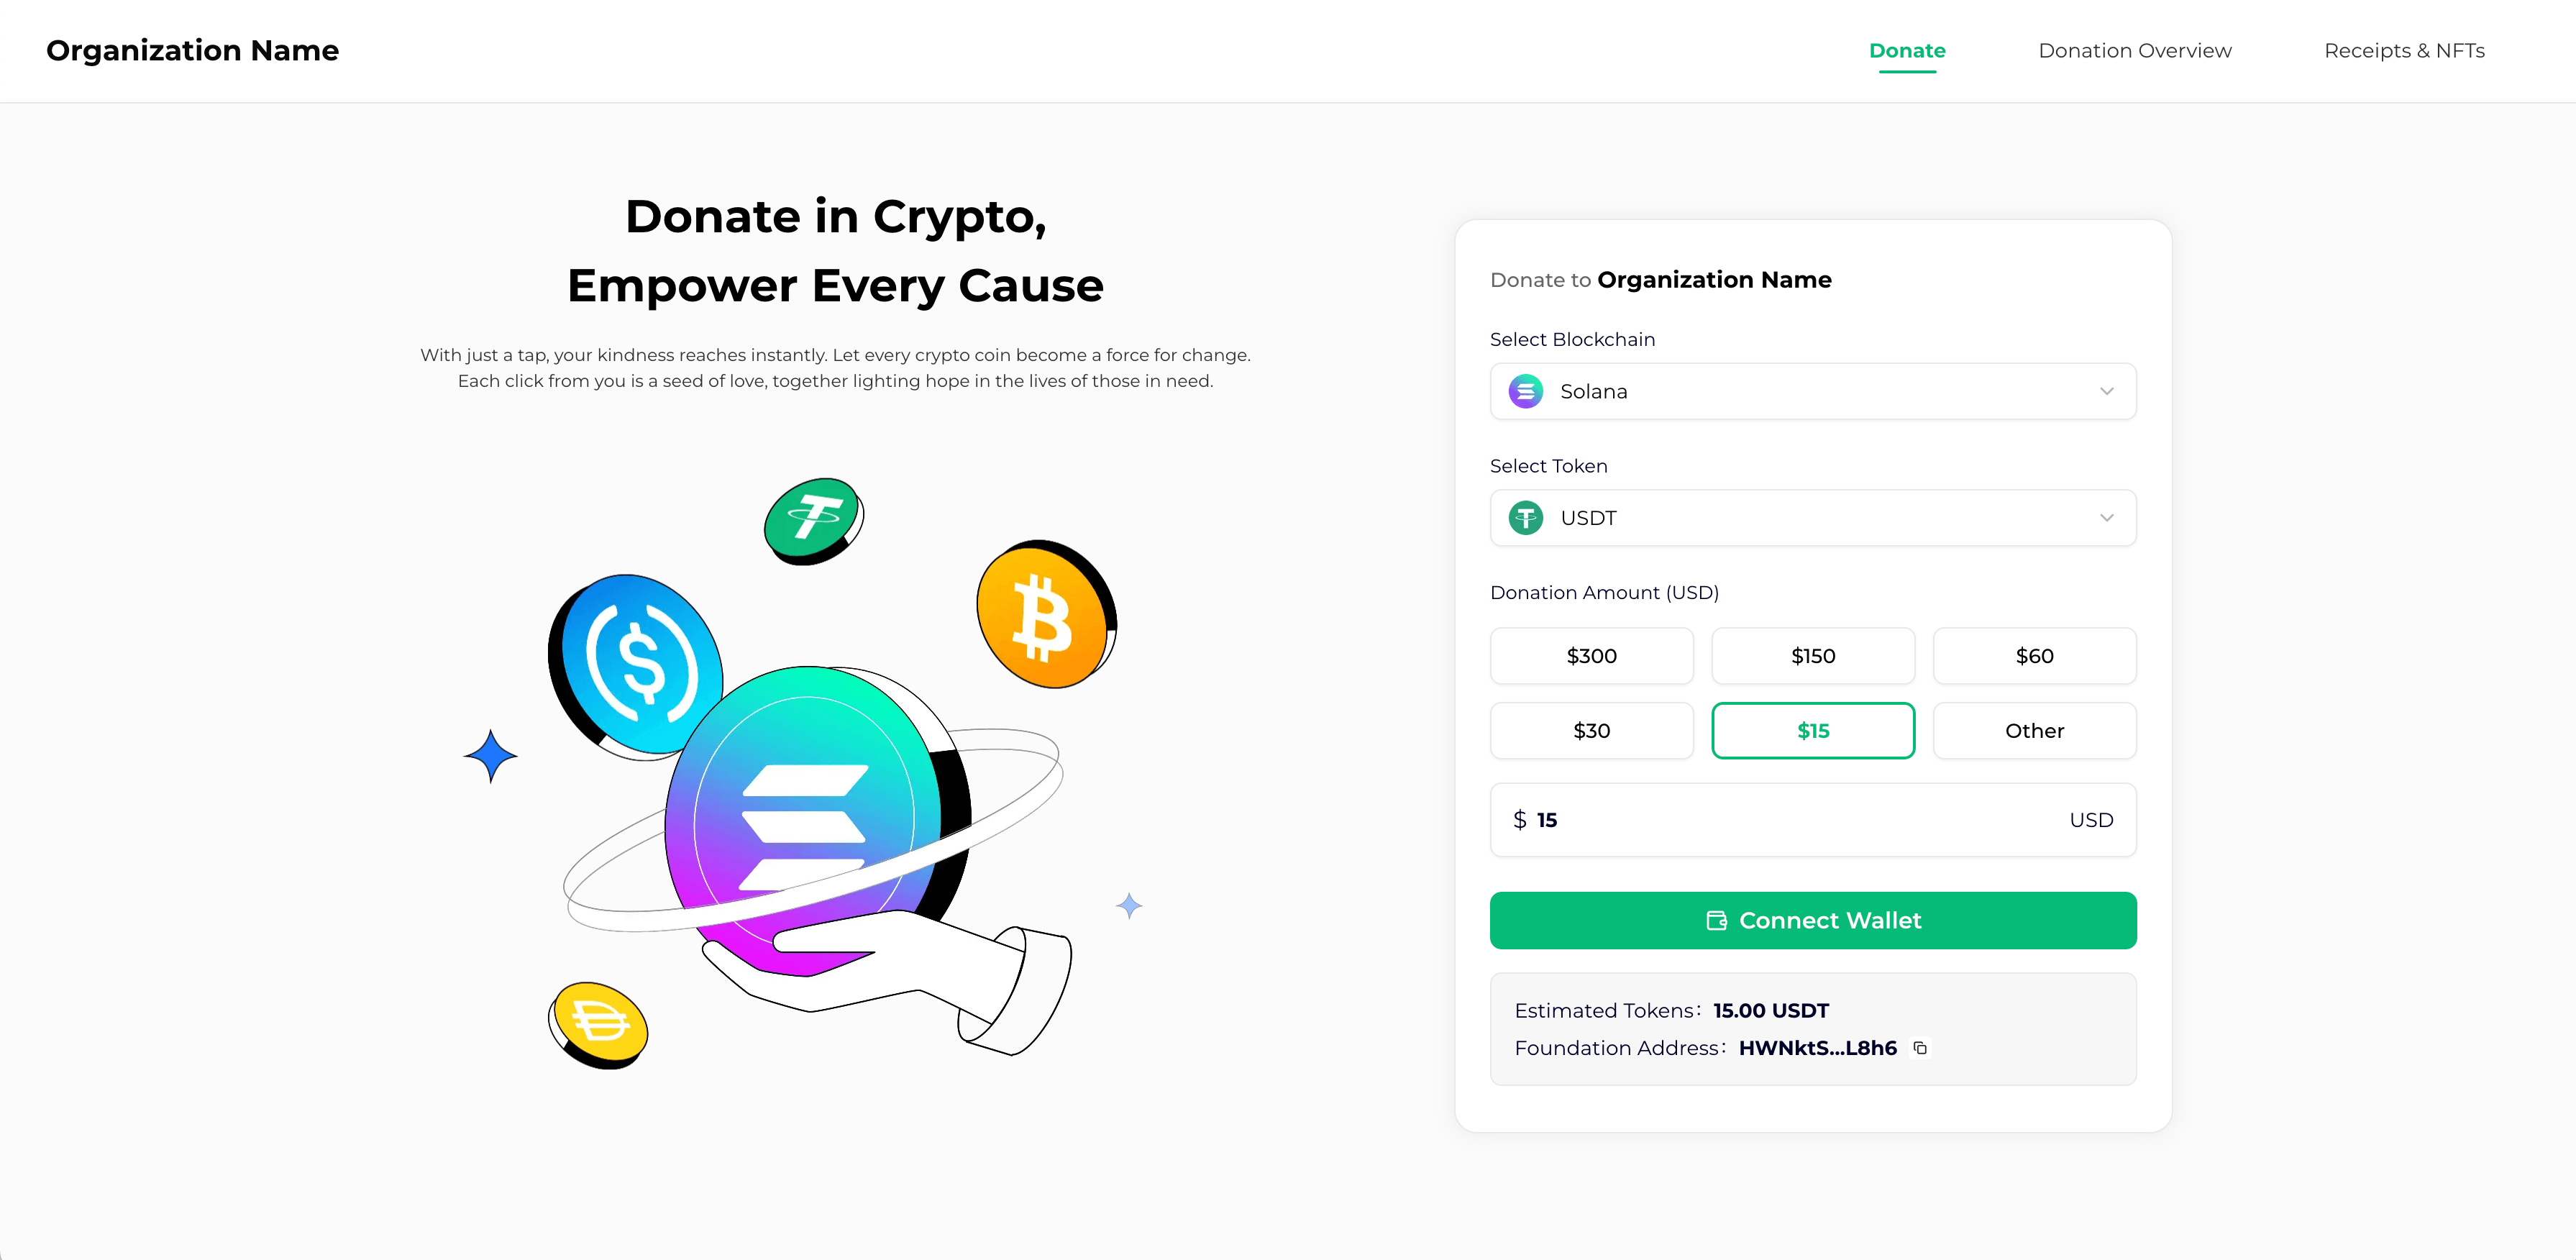
1. How to Donate
- Select Blockchain.
- Select Token.
- Choose or enter the donation amount.
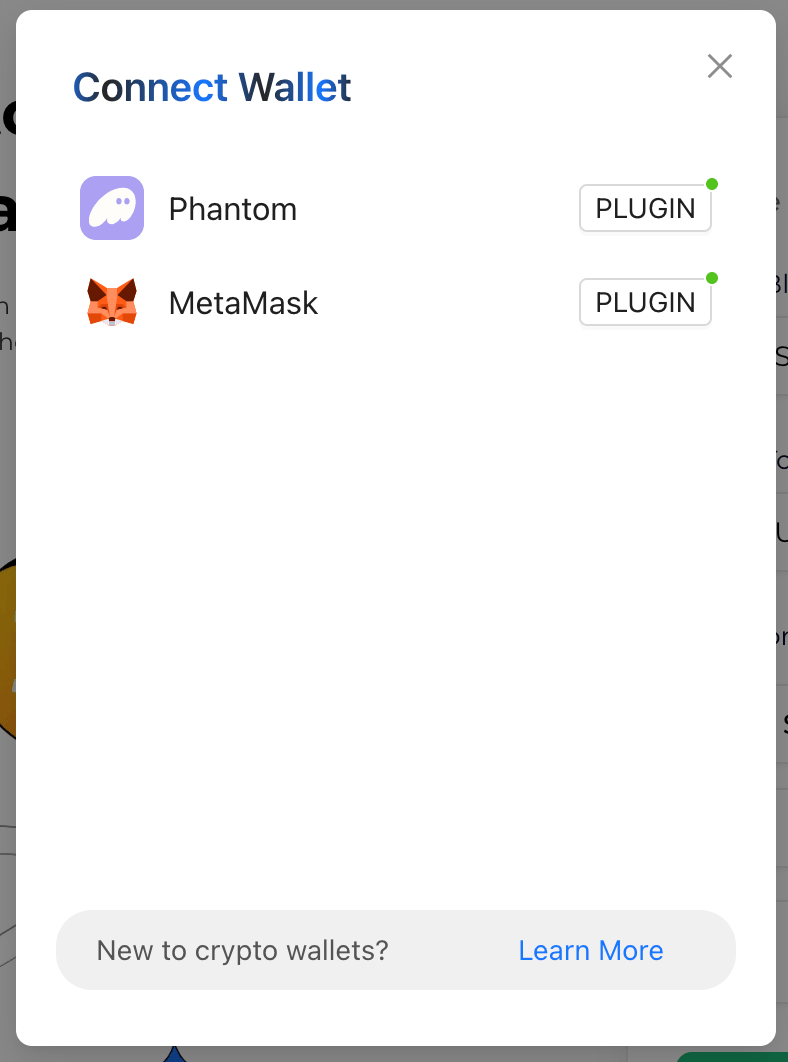
- Click "Connect Wallet."
- Select your wallet in the pop-up window.
(Note: This should be the donor's personal wallet, not the nonprofit's receiving wallet.)
- Click "Confirm & Donate", then confirm the transaction in your wallet.
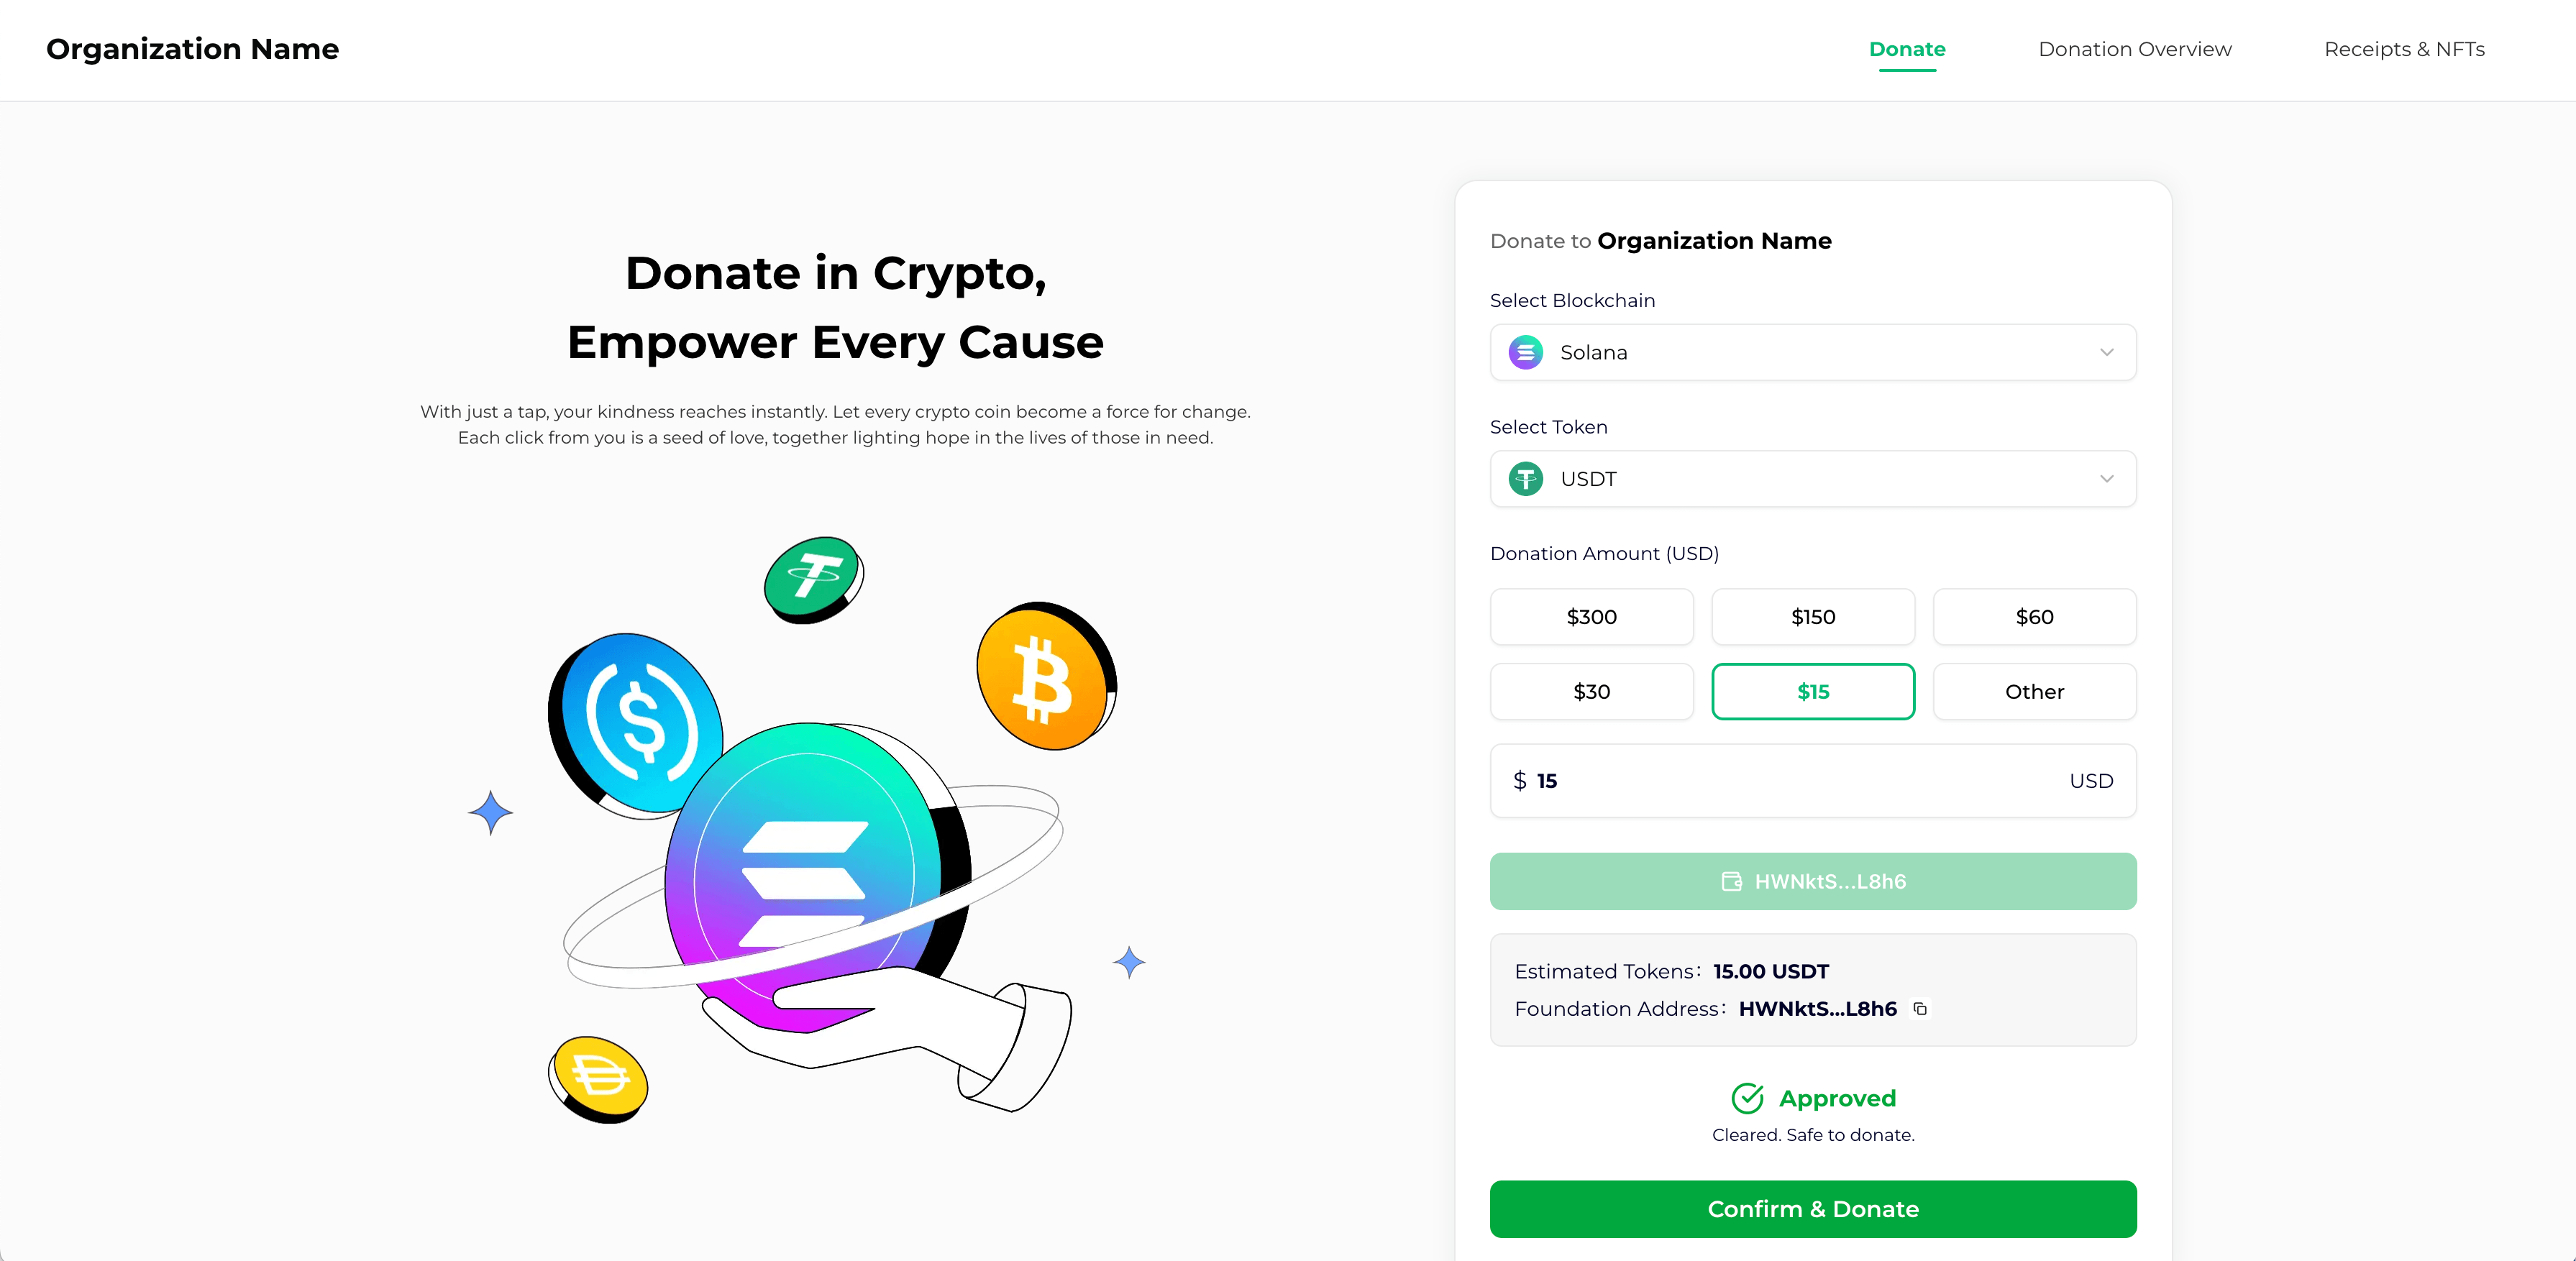
- The donation will then be completed.
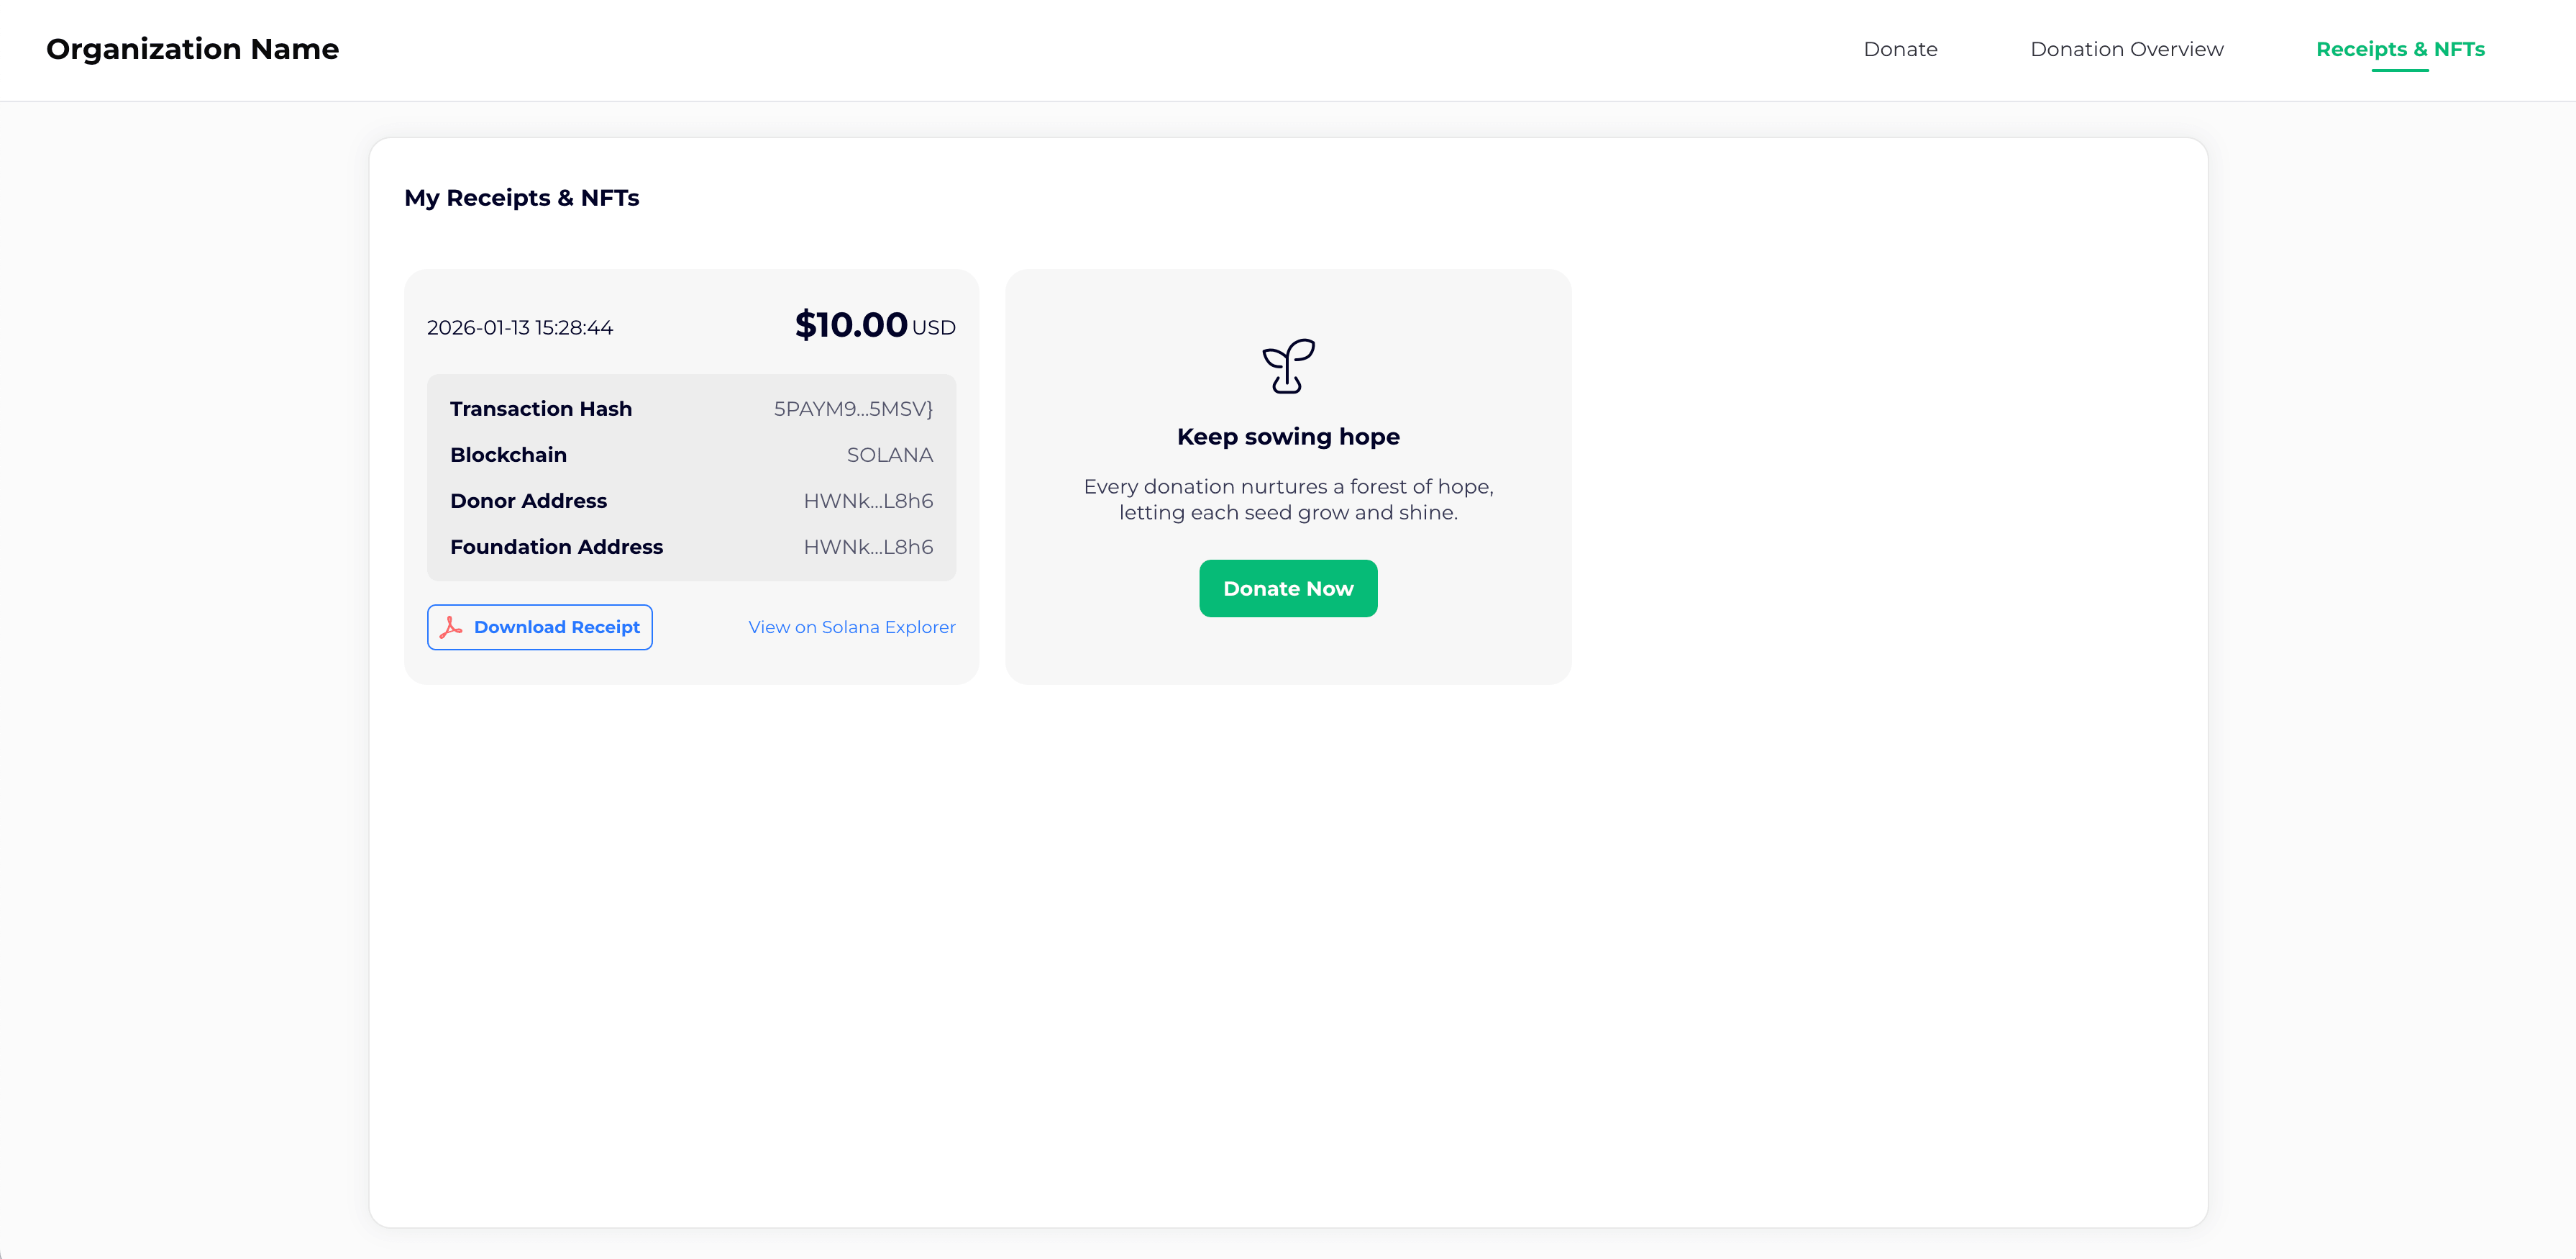
2. View Donation Records
- Click the "Receipts & NFTs" menu.
- Enter the wallet address used for the donation.
- Click "Search Receipts".
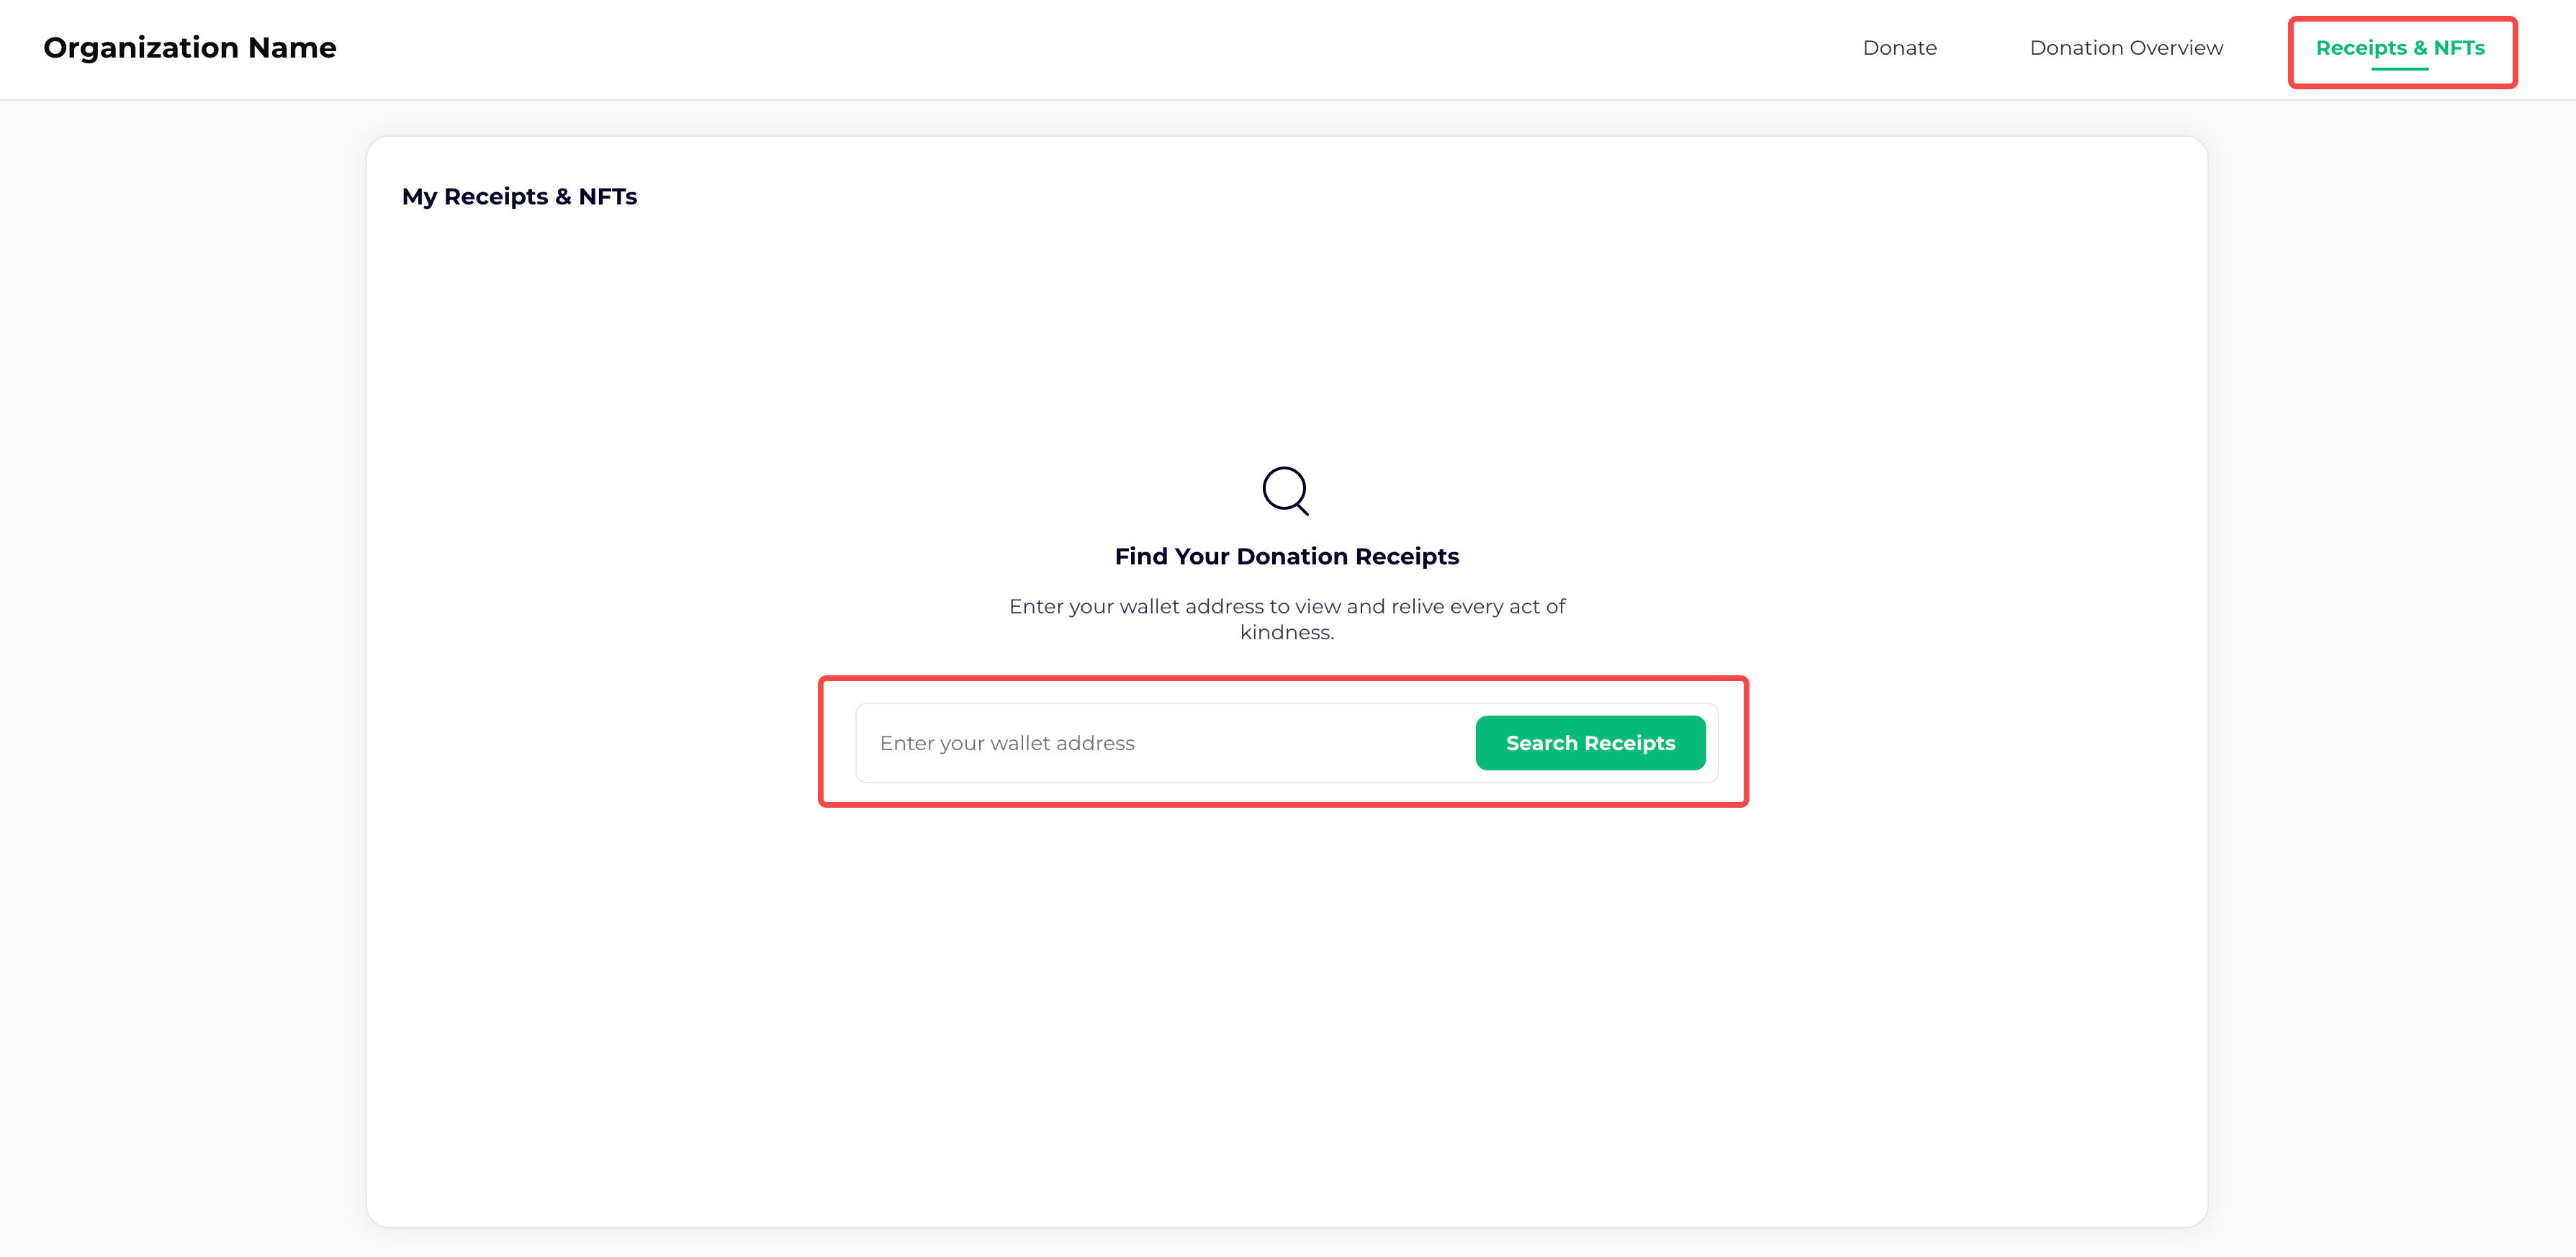
You can then:
- View all donation records for that wallet.
- Click "View on Solana Explorer": Click to see the transaction details on the blockchain explorer.